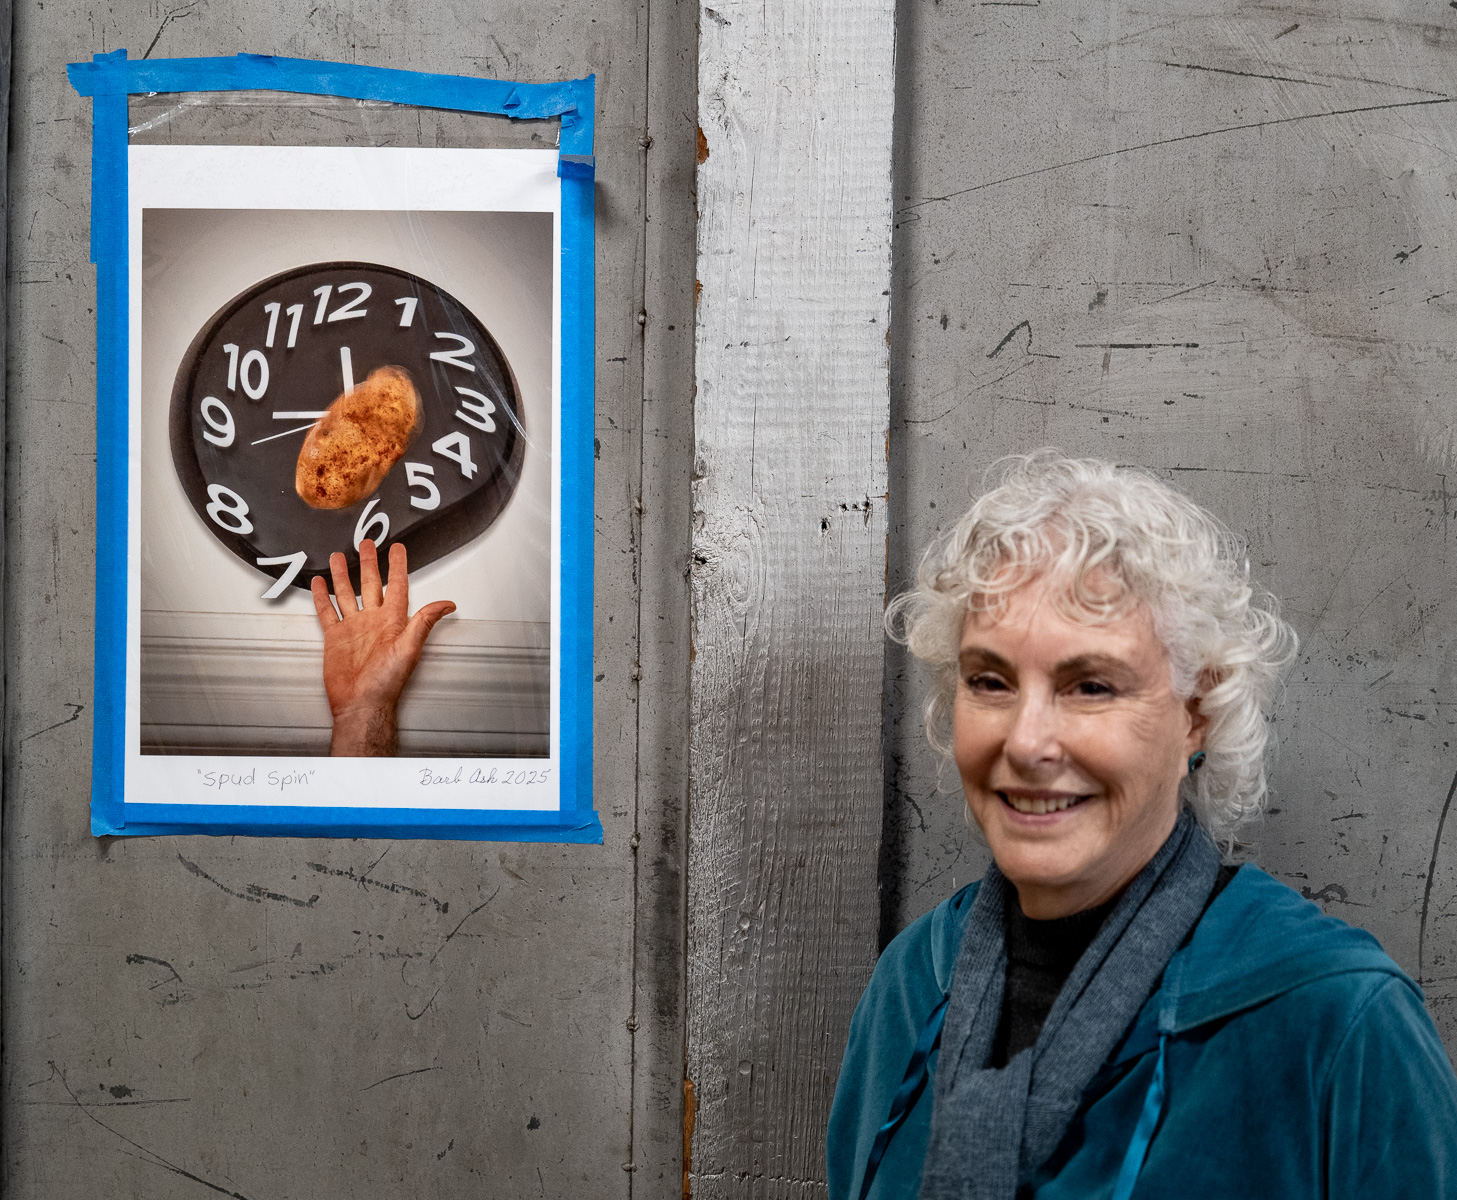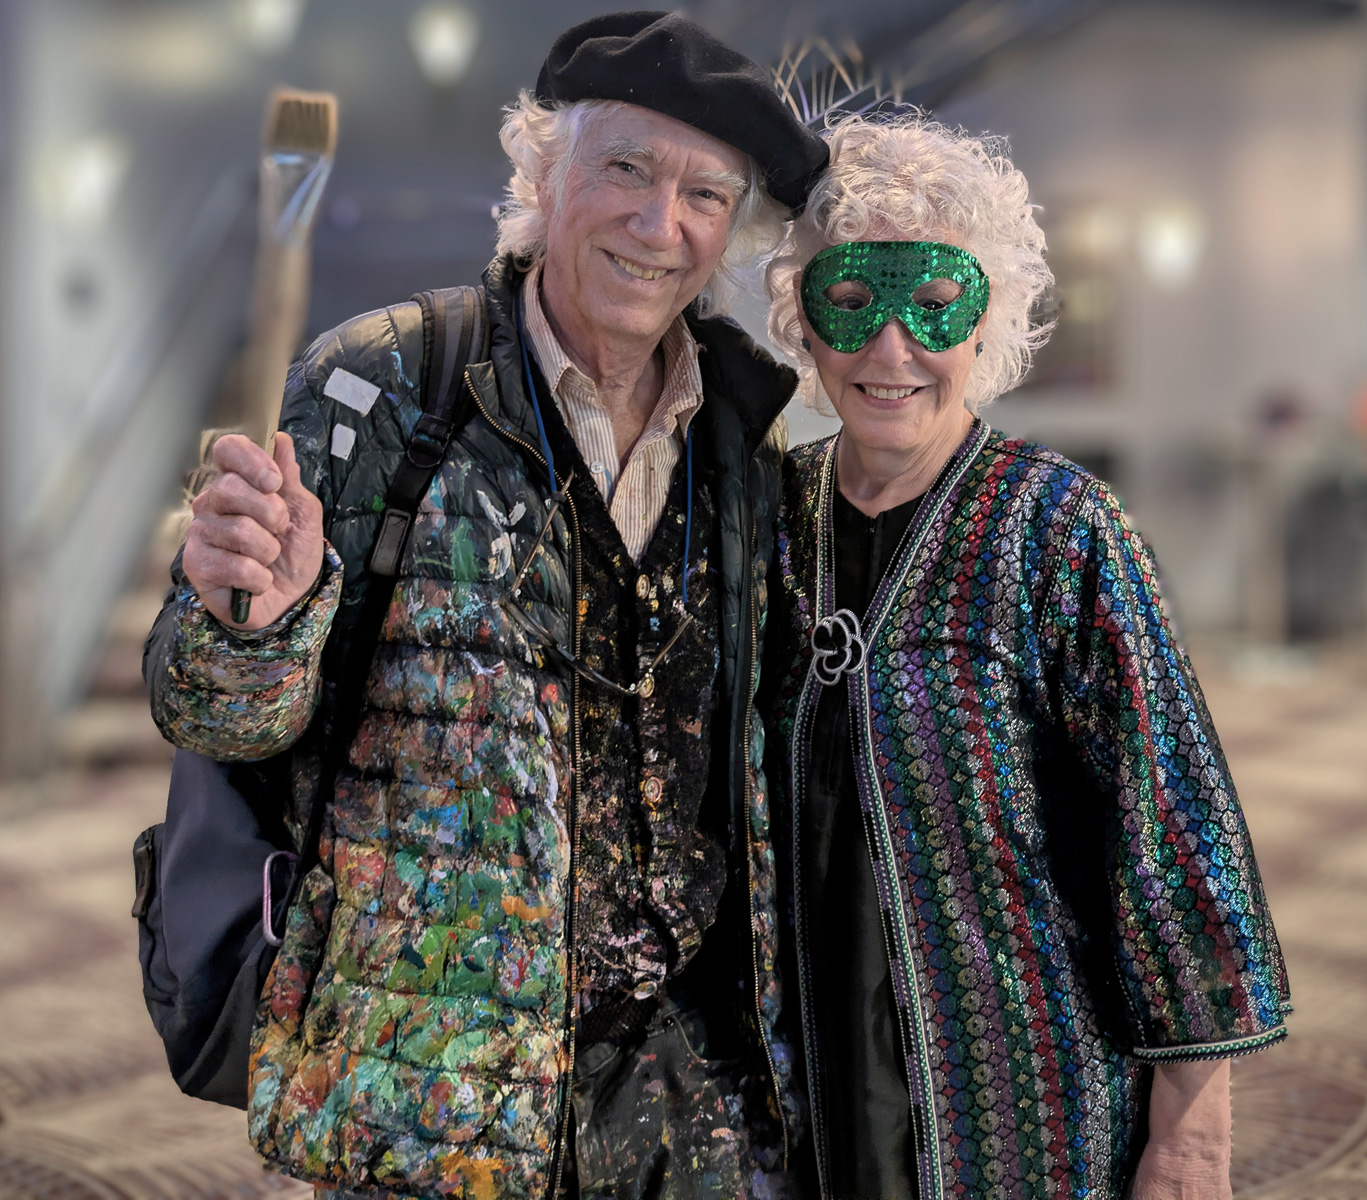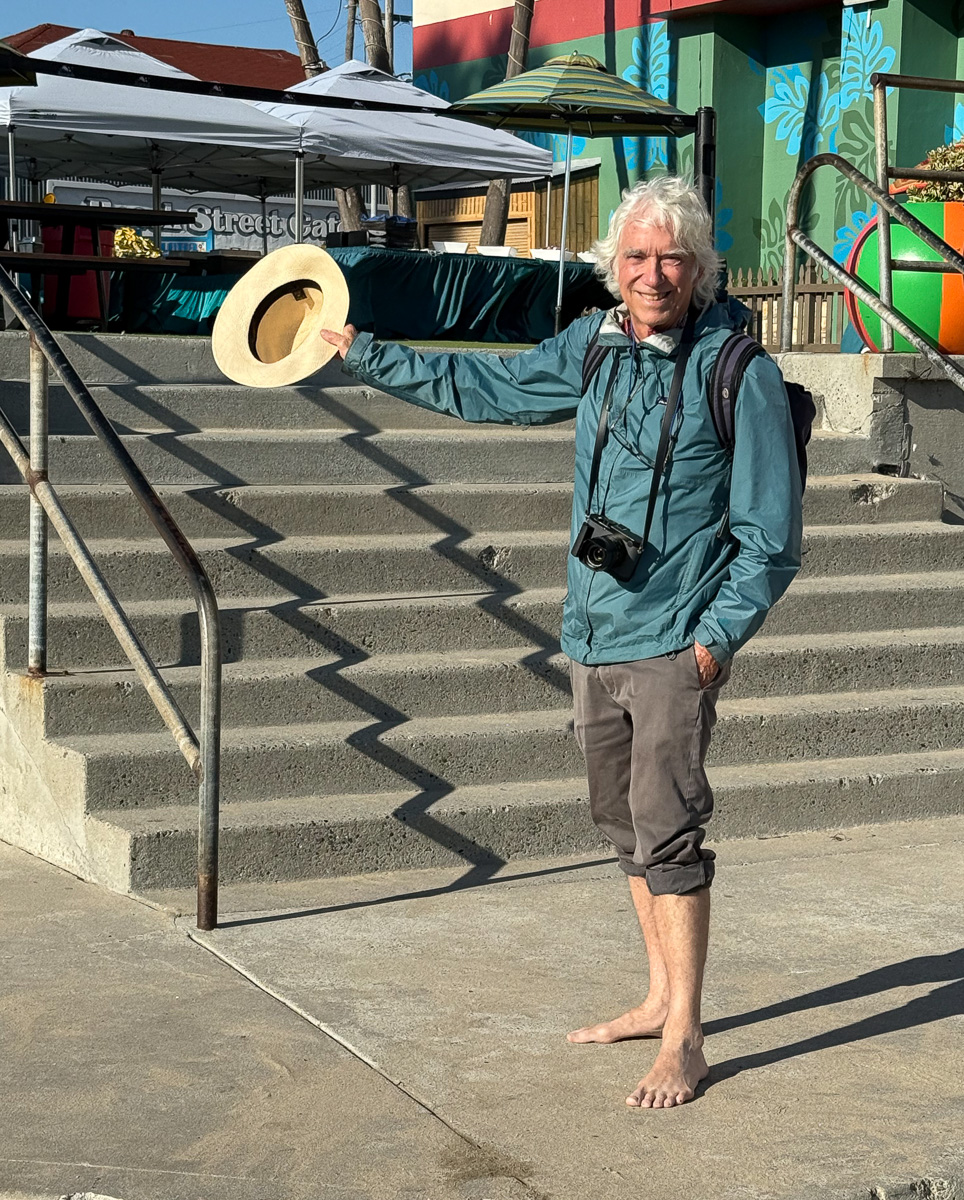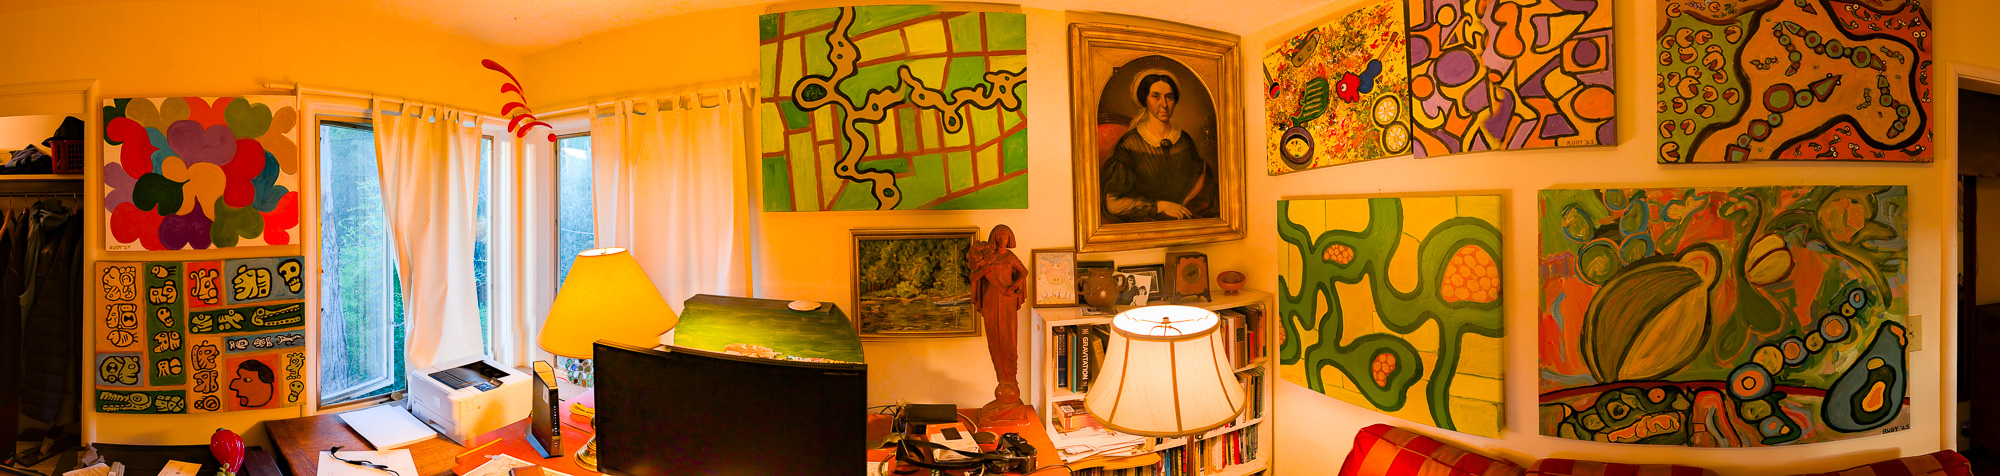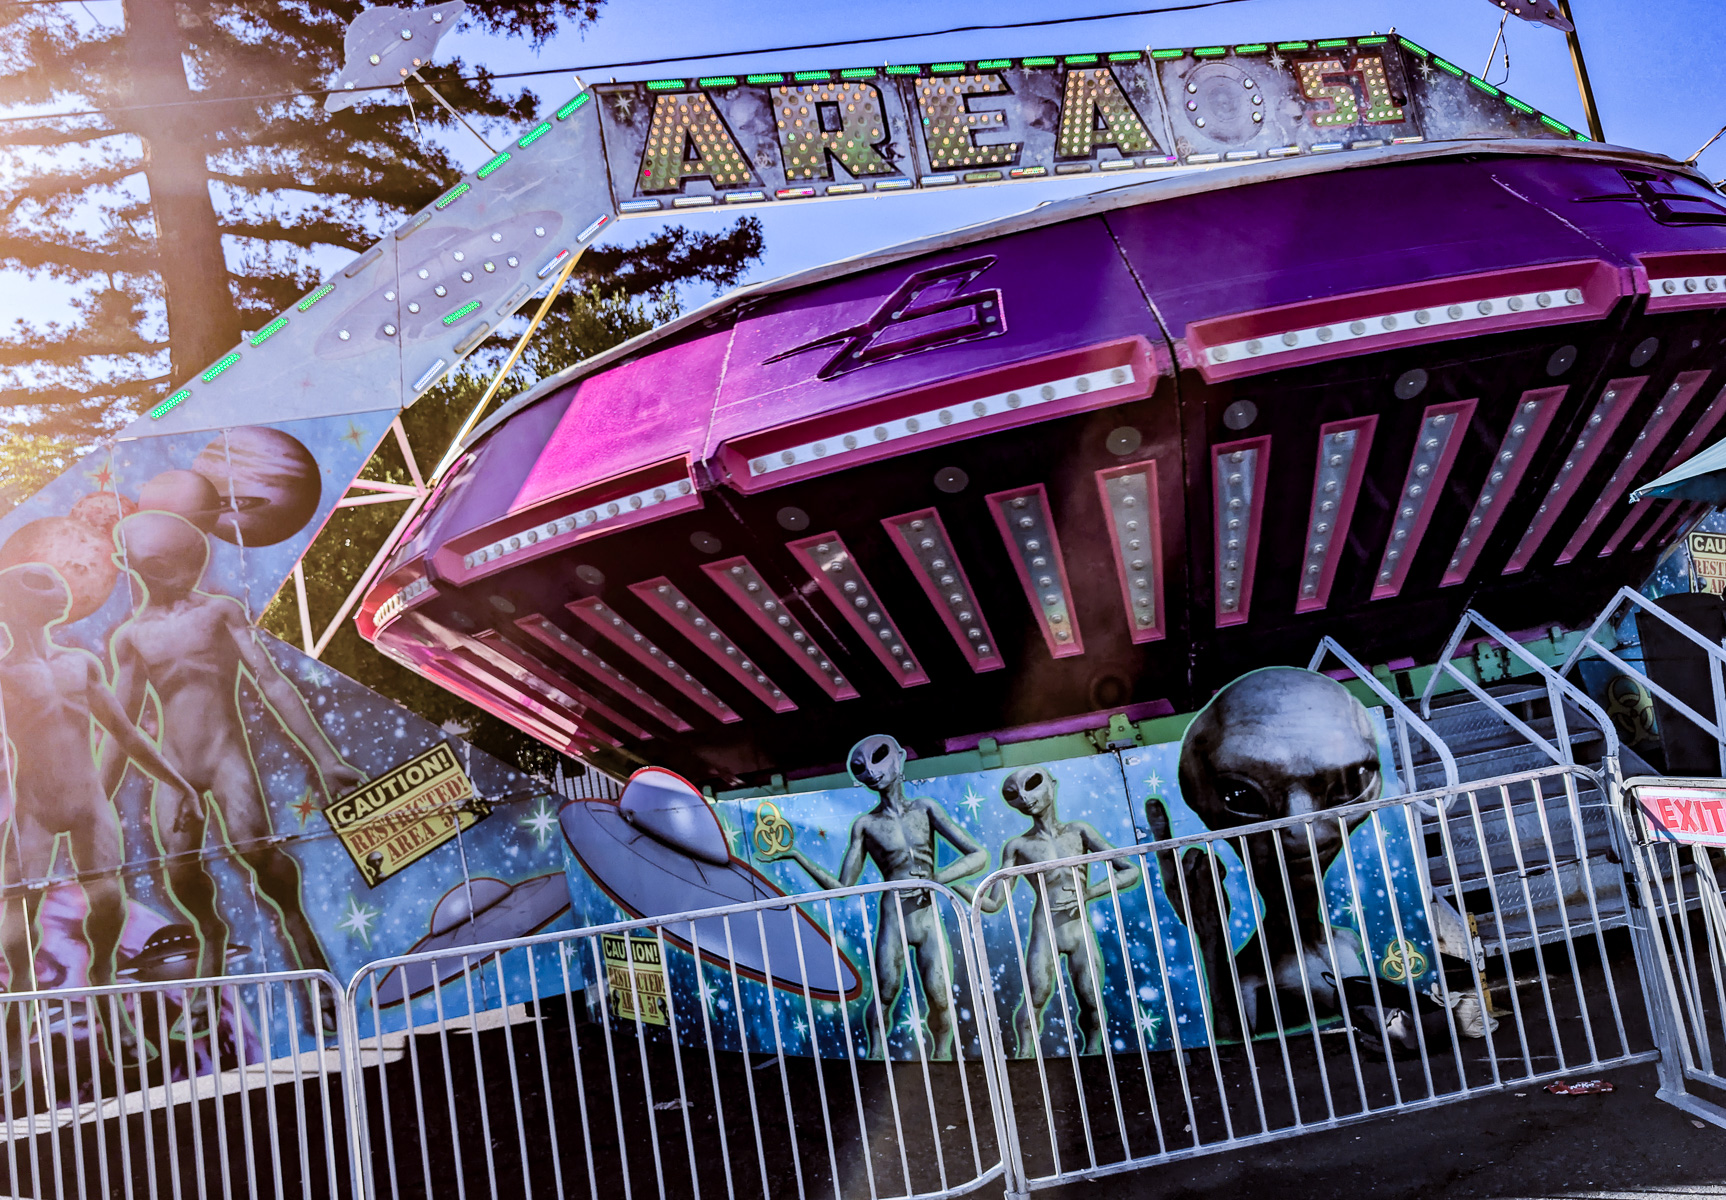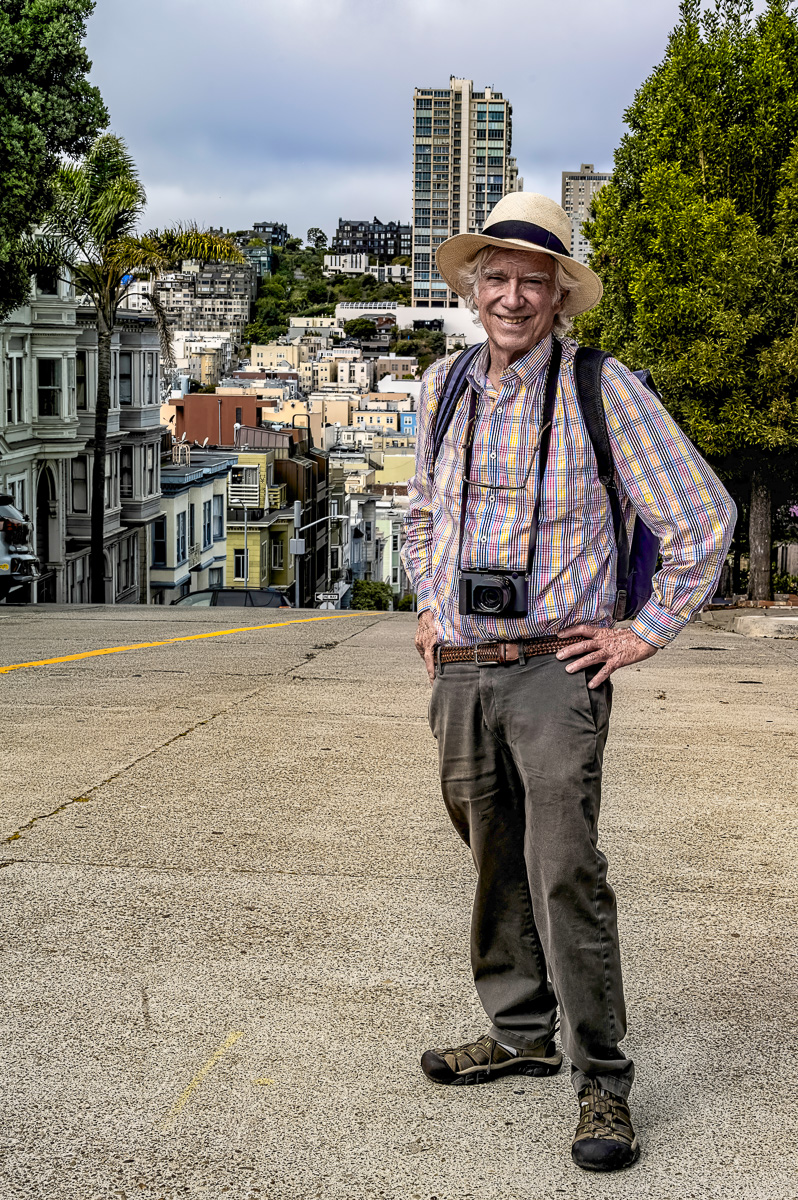
A talk on recent paintings by Rudy Rucker. Inspired by his sojourns in the lands of math and SF. The idea of the talk is to compare three different channels of communication: conversation, text, and paintings. The talk was be part of a Dorkbot event on February 25, 2026 at the Monkeybrains building in the SF Mission.
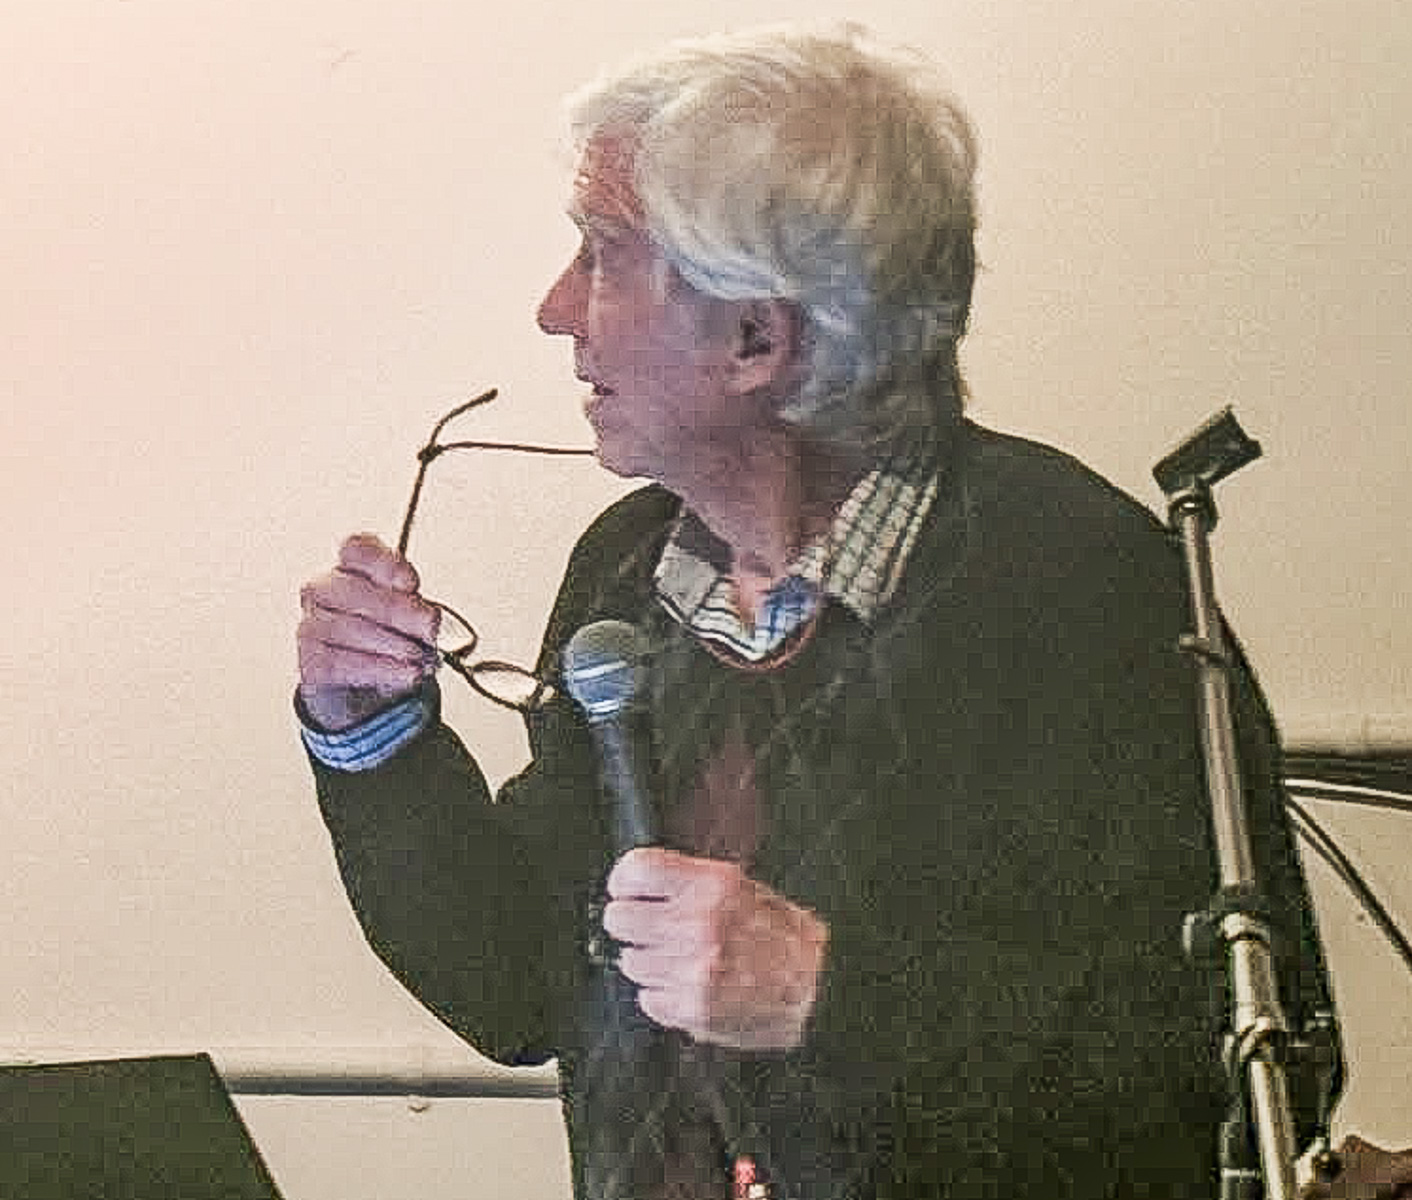
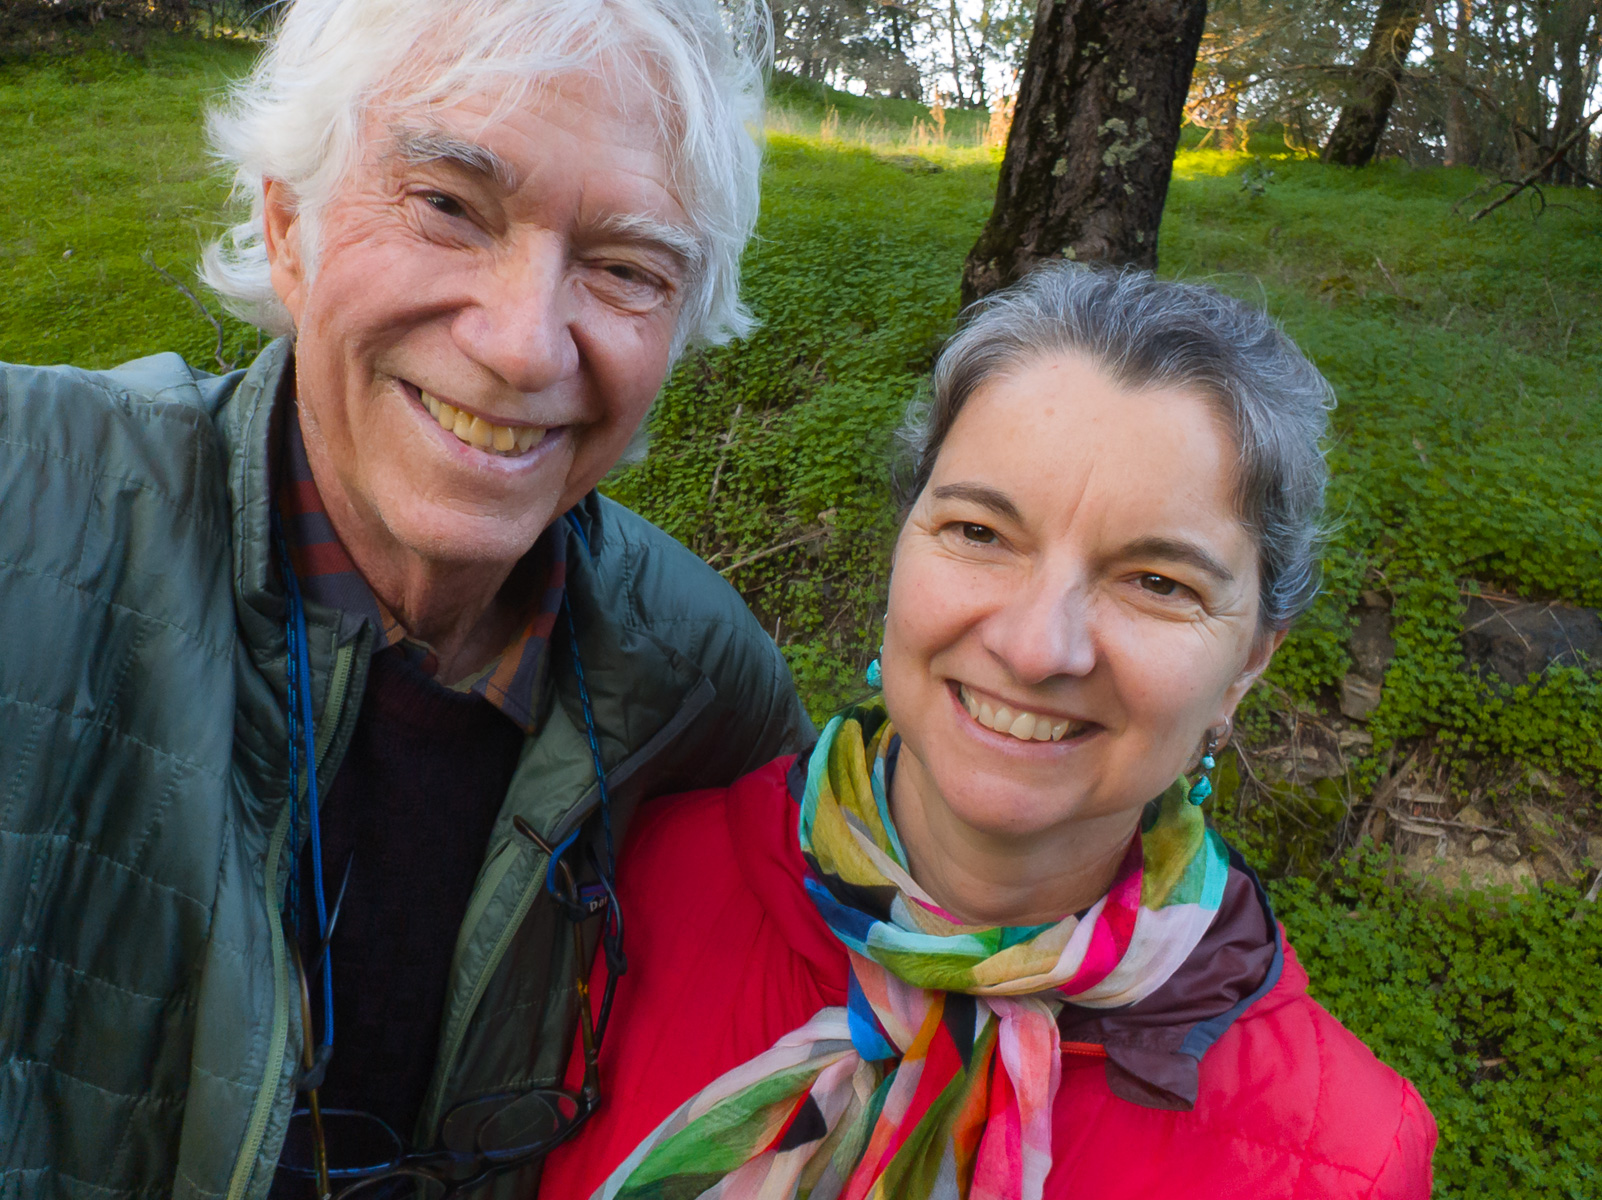
Photo by Karen Marcelo.
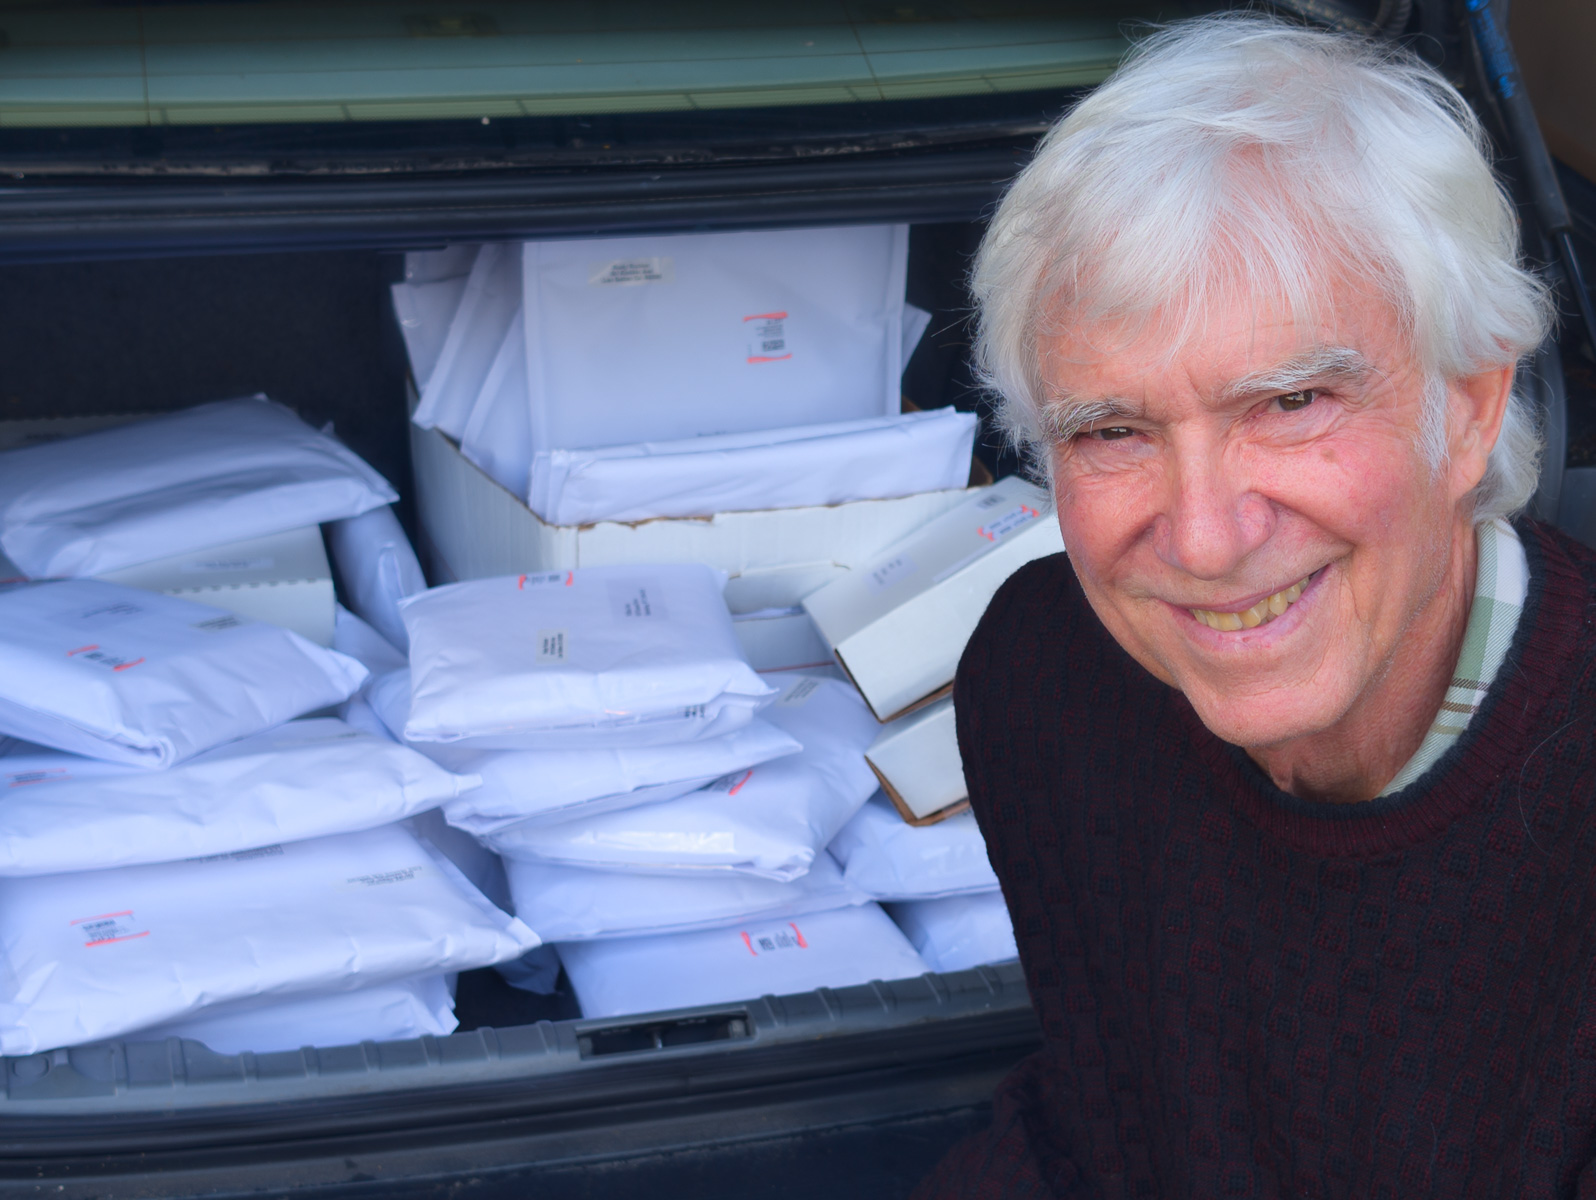
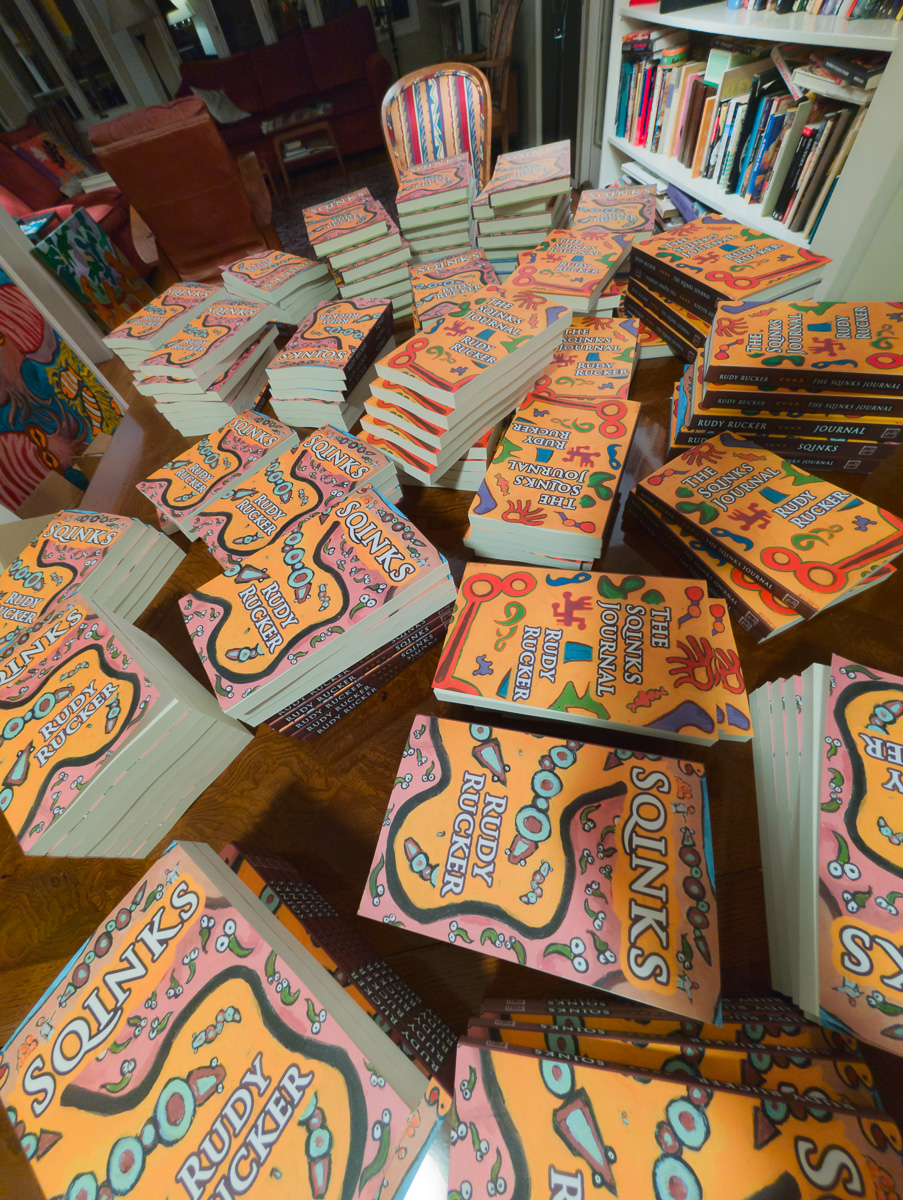
The talk went over well, and I sold some high-quality prints that I made.
I didn’t manag to tape my talk, but I’ve inserted some of my notes for the talk. The notes are bulleted, and are centered.
================
- You want other people to understand what you’re thinking. Lots of reasons. The pleasure of sharing thoughts, and coming to understand your own self better. Making friends, finding a lover, fending off enemies or rivals. Asking for food, shelter, or affection. Giving and getting information. Doing philosophy. Telling jokes. Reminiscing. Entertaining. Sharing emotions.
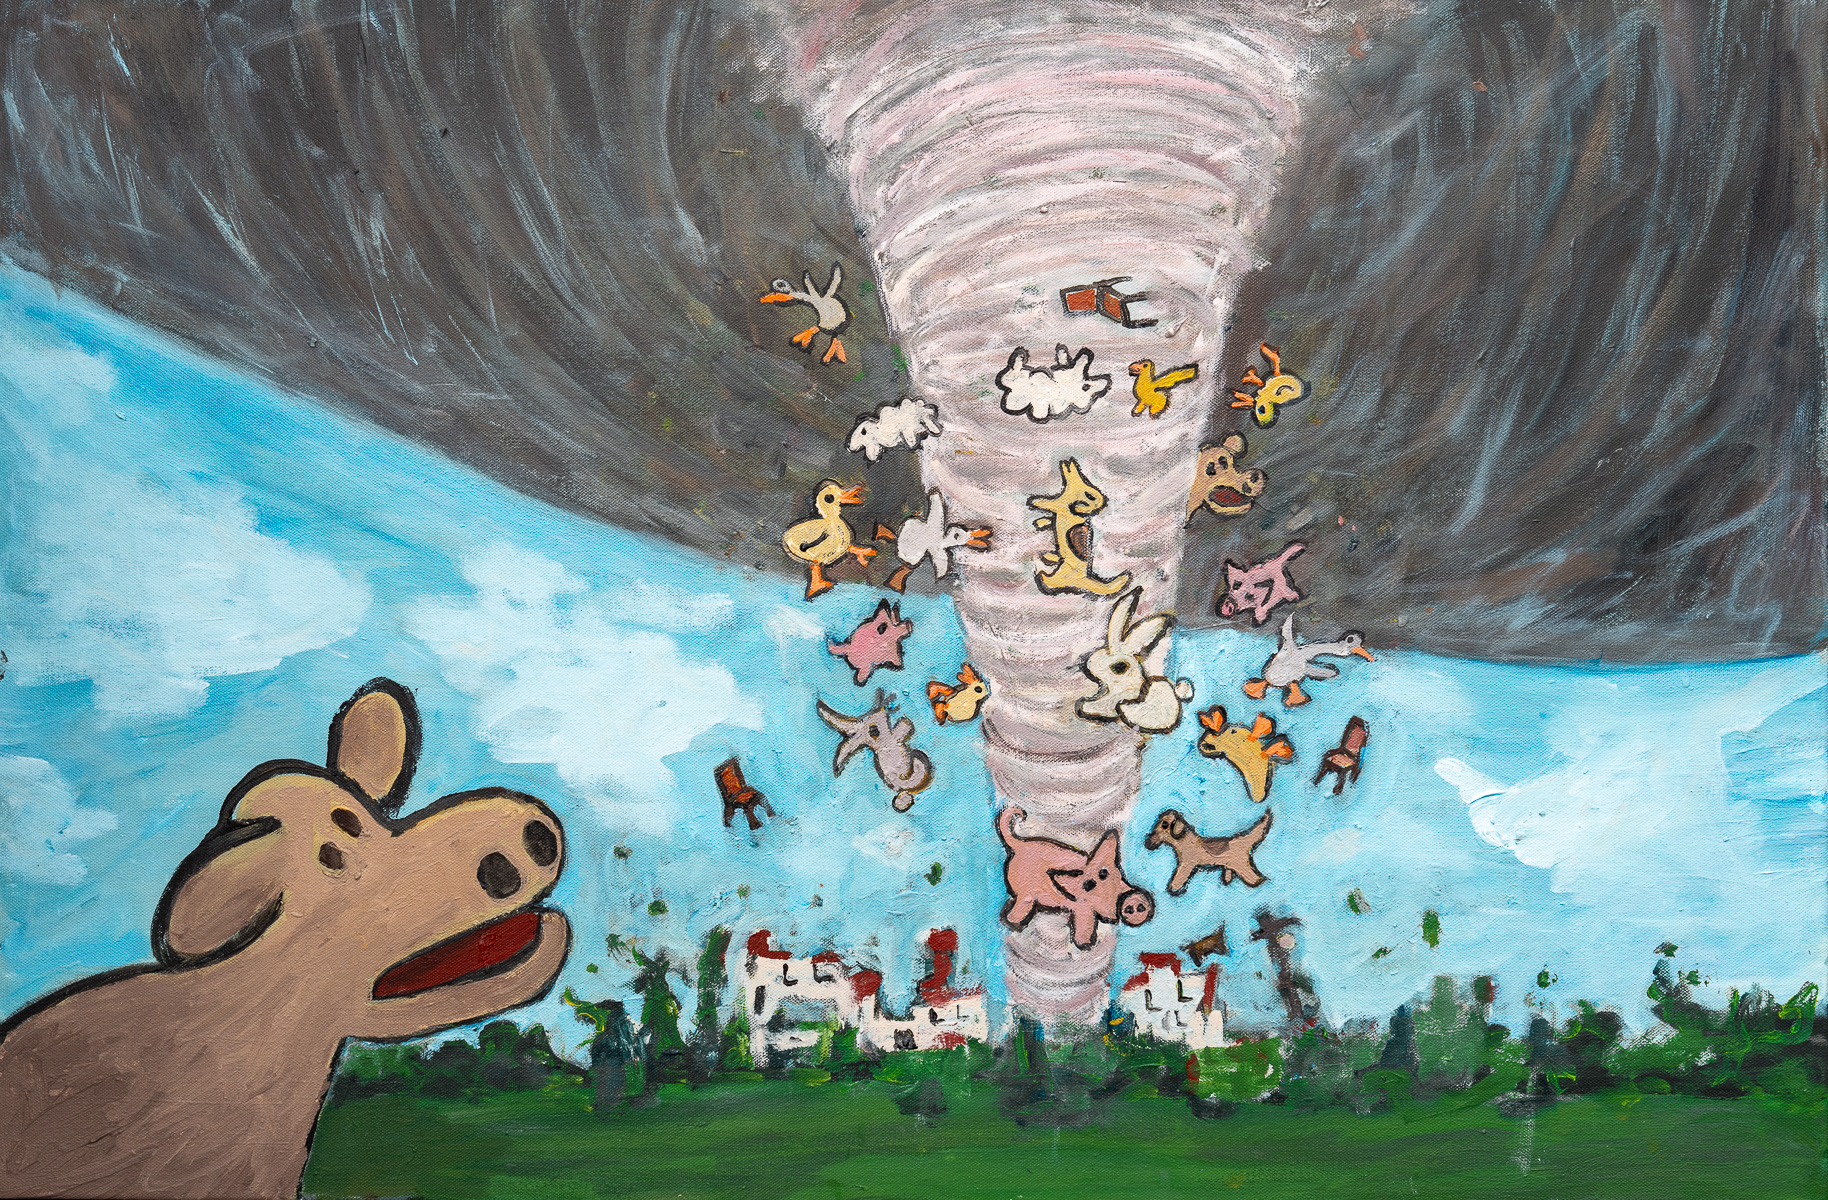
292. Farm Tornado
Acrylic on canvas, 36″ x 24″. February, 2026
Sometimes I watch tornado videos on YouTube. These are made by fanatical storm chasers who seek out heavy weather. In one of the videos I saw a beautiful frame that I wanted to paint. So I screen-grabbed it, and got hold of a wide canvas, and painted the scene, and it was pretty easy. But it felt maybe too too easy; also my painting wasn’t really as good as the photo. So I decided to make this more of a Rudy painting…with critters! A a farm’s worth of animals. What with tweaking and retweaking the tornado itself, the process took me a long time, eight or nine sessions. It’s in a playful style, not stressing the dangers—although those three empty chairs make your wonder. I liked having a cow off to one side, watching. “Mur?”
- Speaking face to face is the richest channel. The tones and harmonies of the voices. Body language comes in, not to mention micro facial expressions. Scents, fragrances, pheromones. The touch of skin.
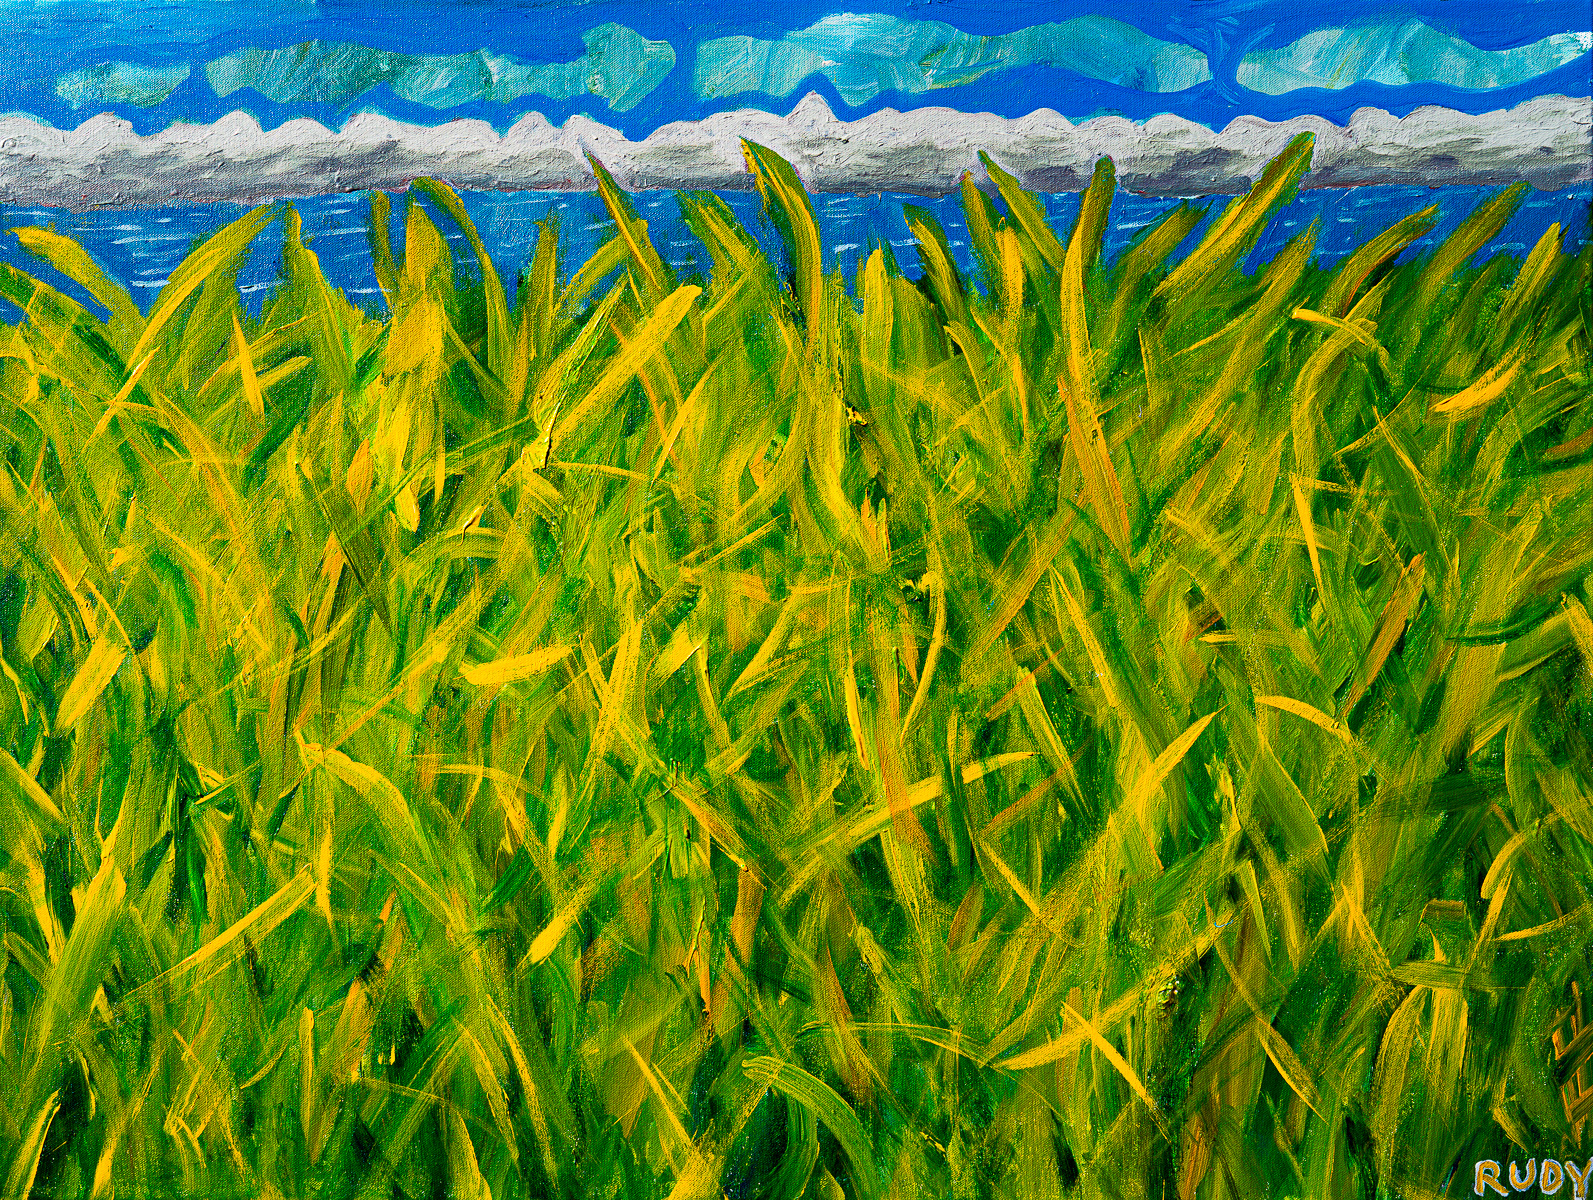
291. The Light
Acrylic on canvas, 40″ x 30″. January, 2026
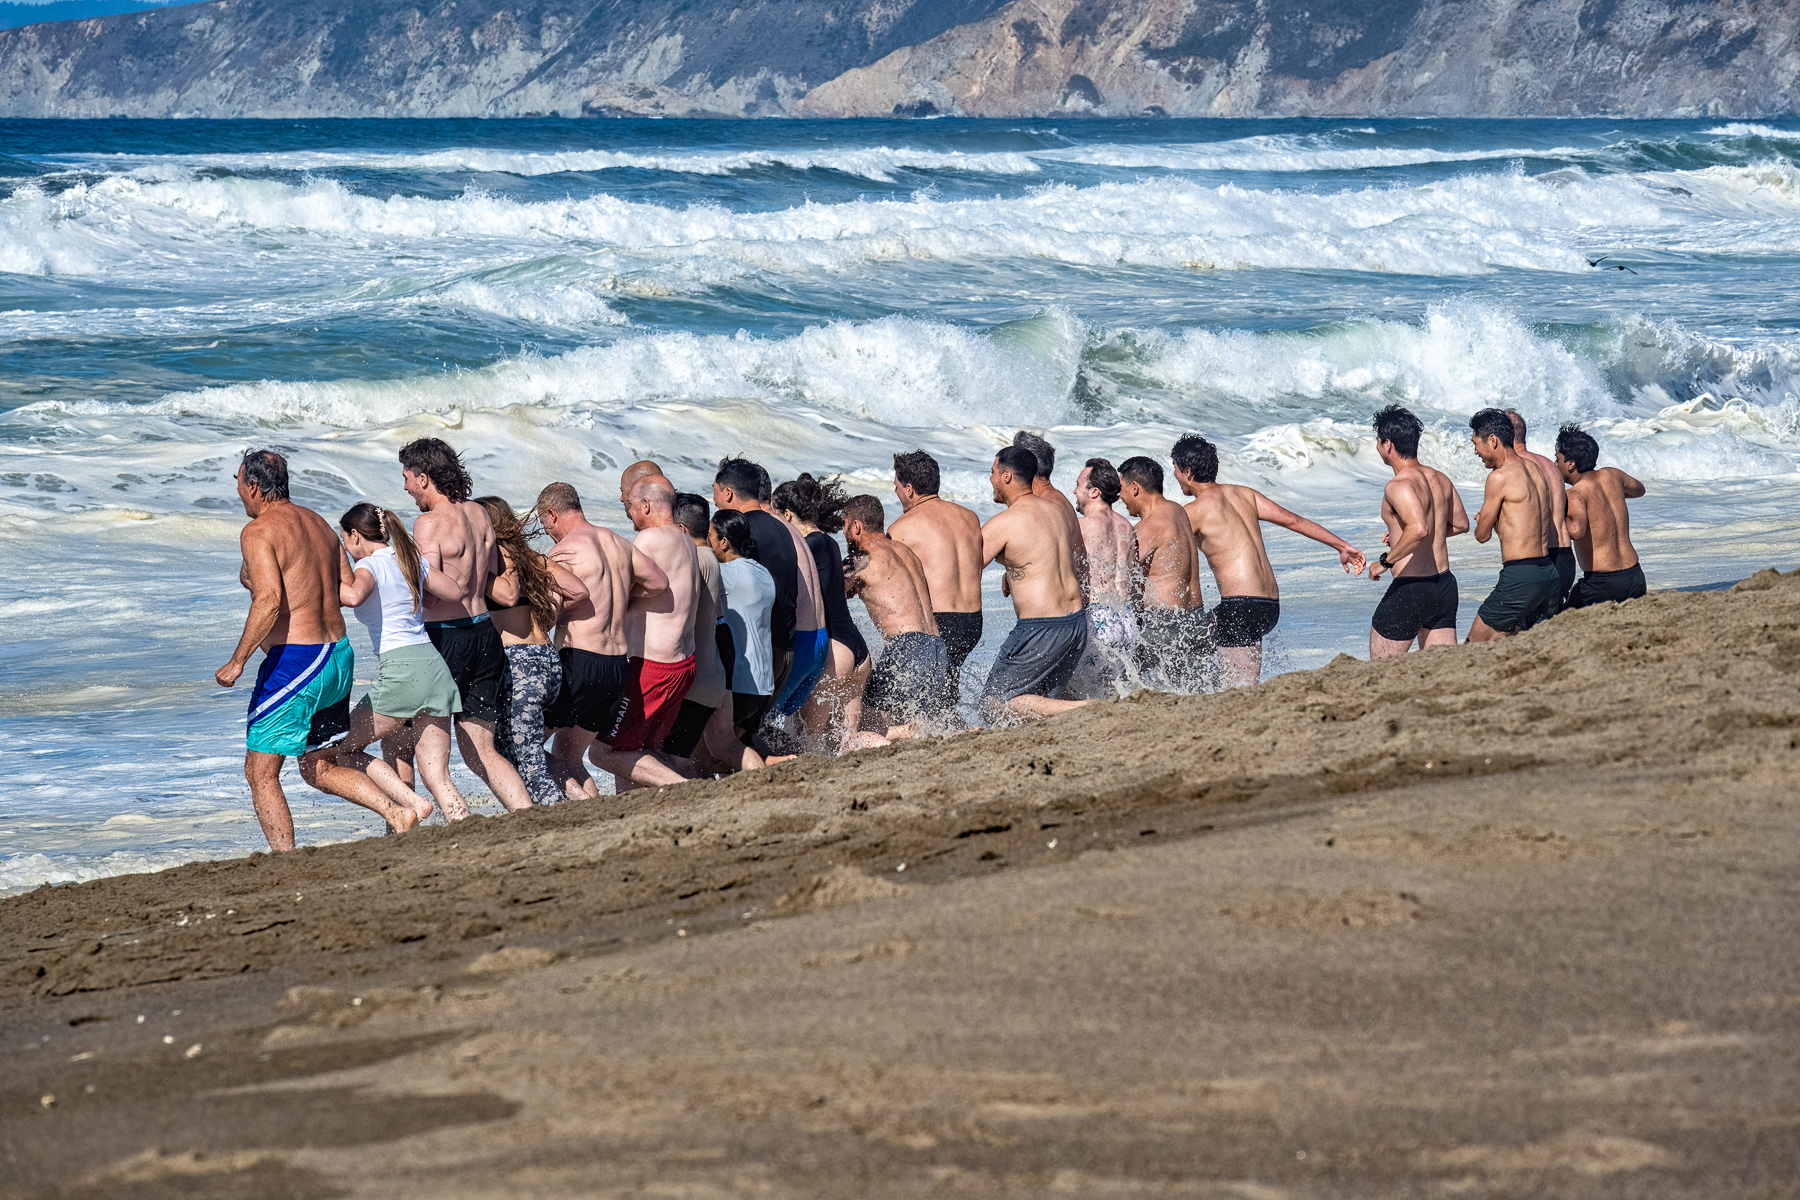
Brilliant sunlight and fresh grass on the bluffs overlooking Three Mile beach north of Cruz.-I love how the light fully illuminates the substance of the grass blades, lighting them up as if they’re stained-glass windows. And I have this recurring mystical sense that there is a higher SUN in, let us say, the fourth dimension, and its glow permeates each of our bodies inside and out. And this shared illumination is the essence of our souls. And all these souls are as one.
- A story make take a couple of weeks, a novel might take a year. A long written work takes on an identity of its own. A thing external to yourself. A place you go and visit every day or two, constantly picking away at it. Buffing it. Erasing and replacing. Annotating, and integrating the notes.
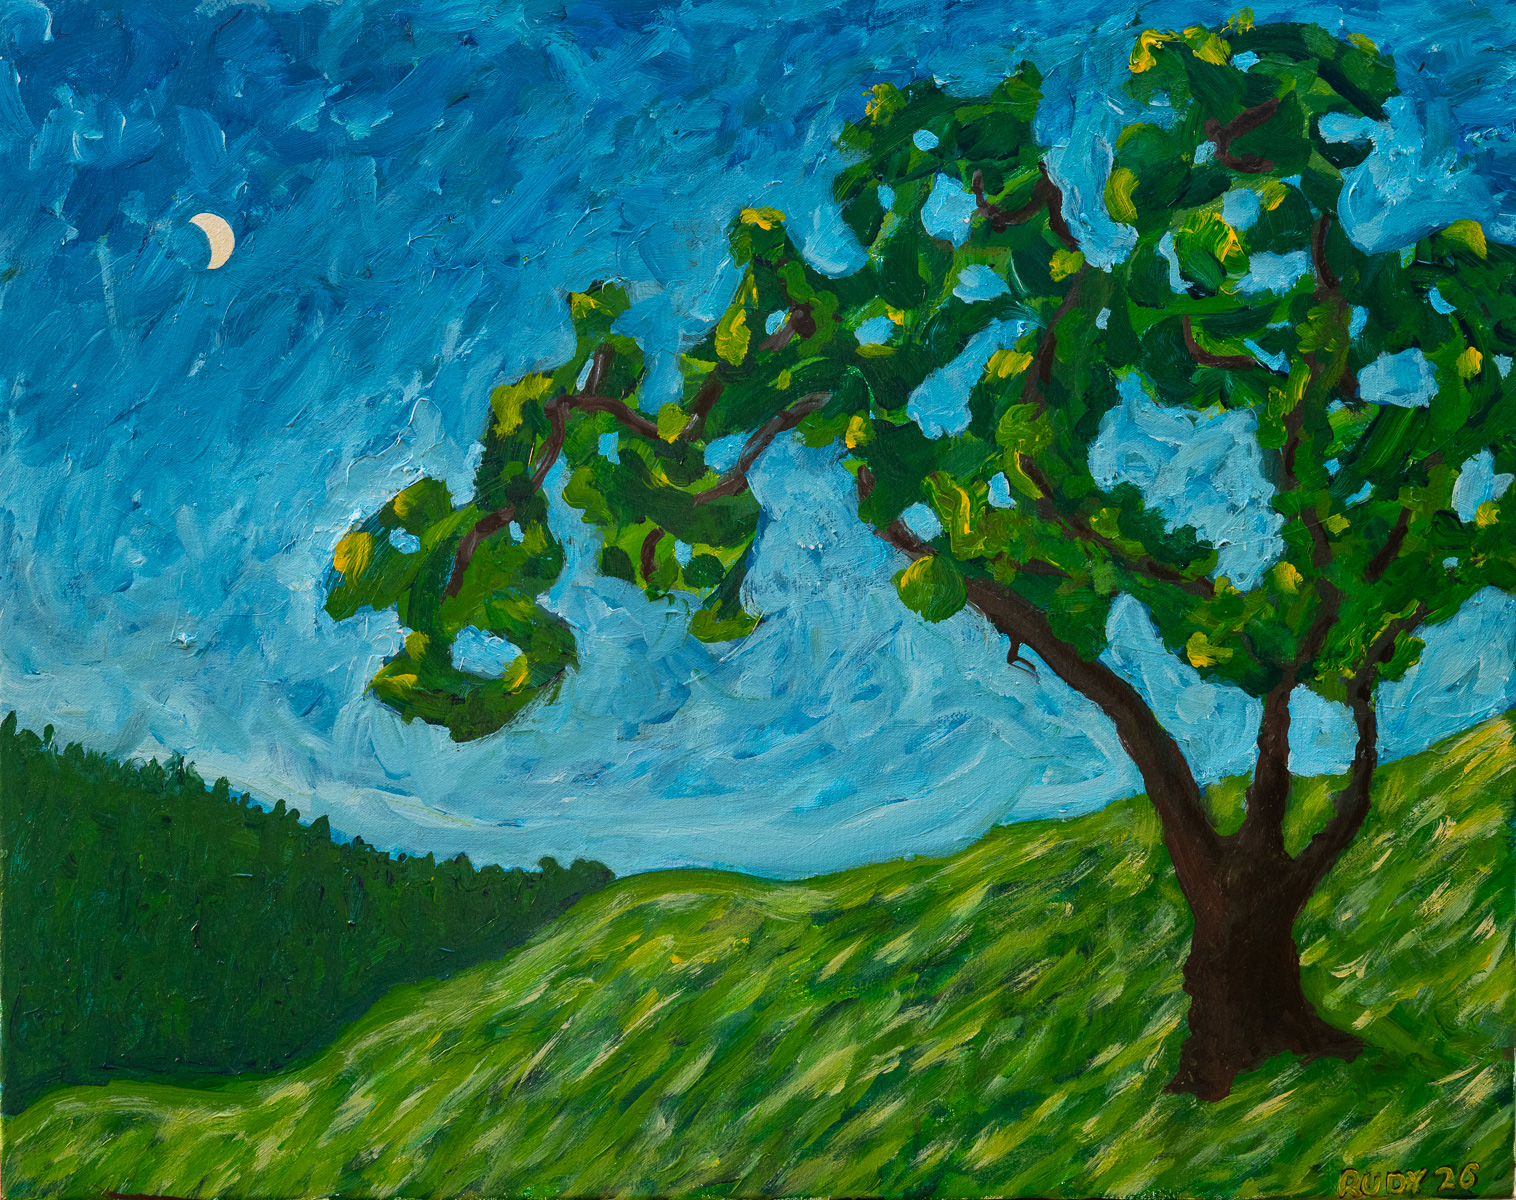
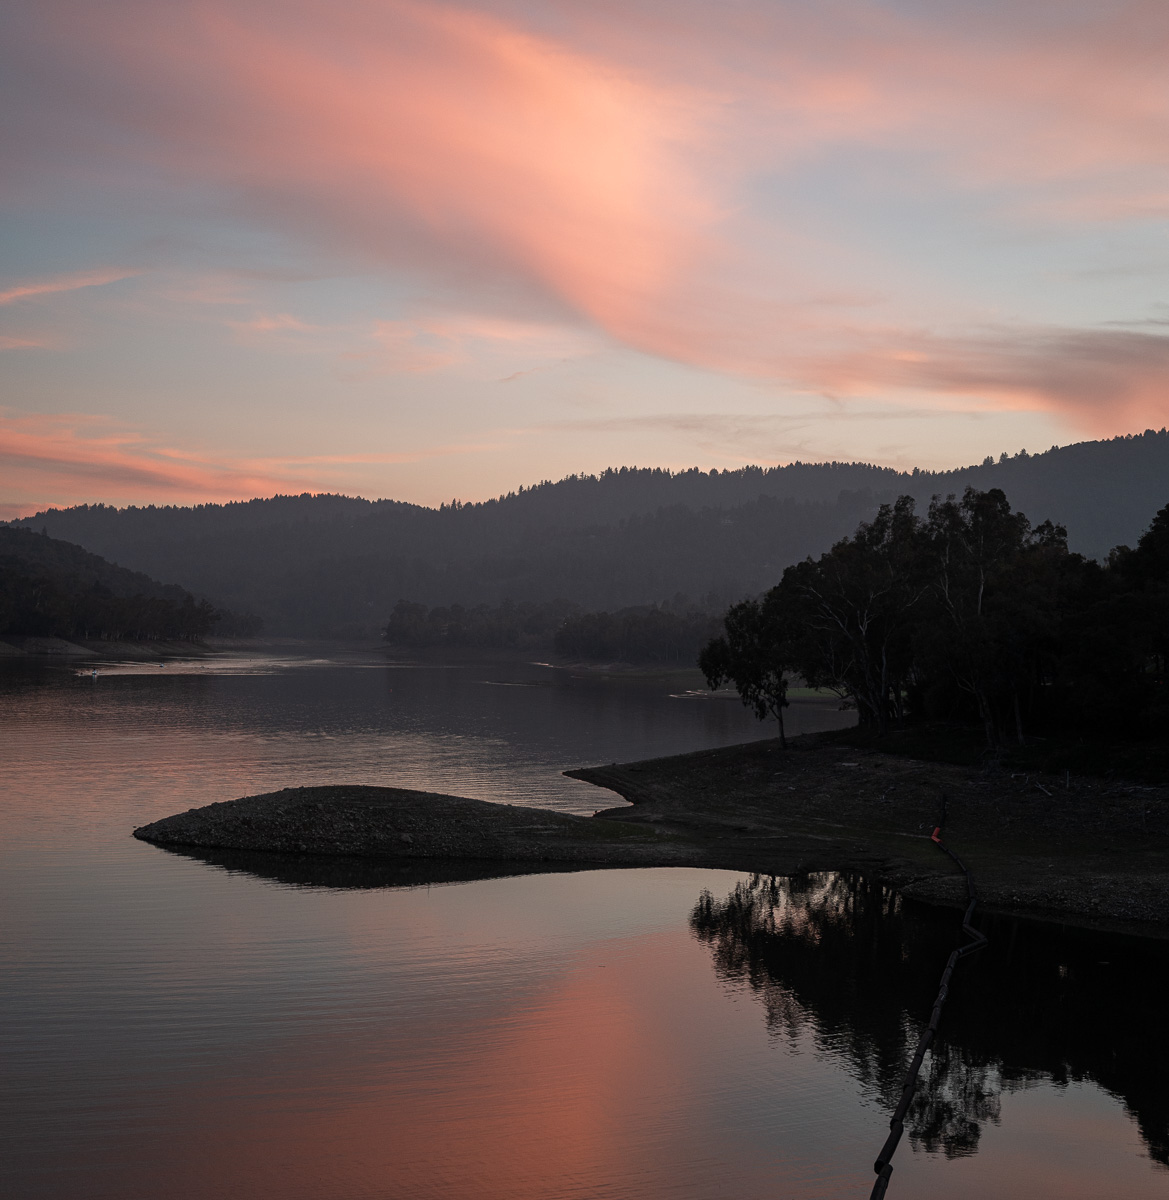
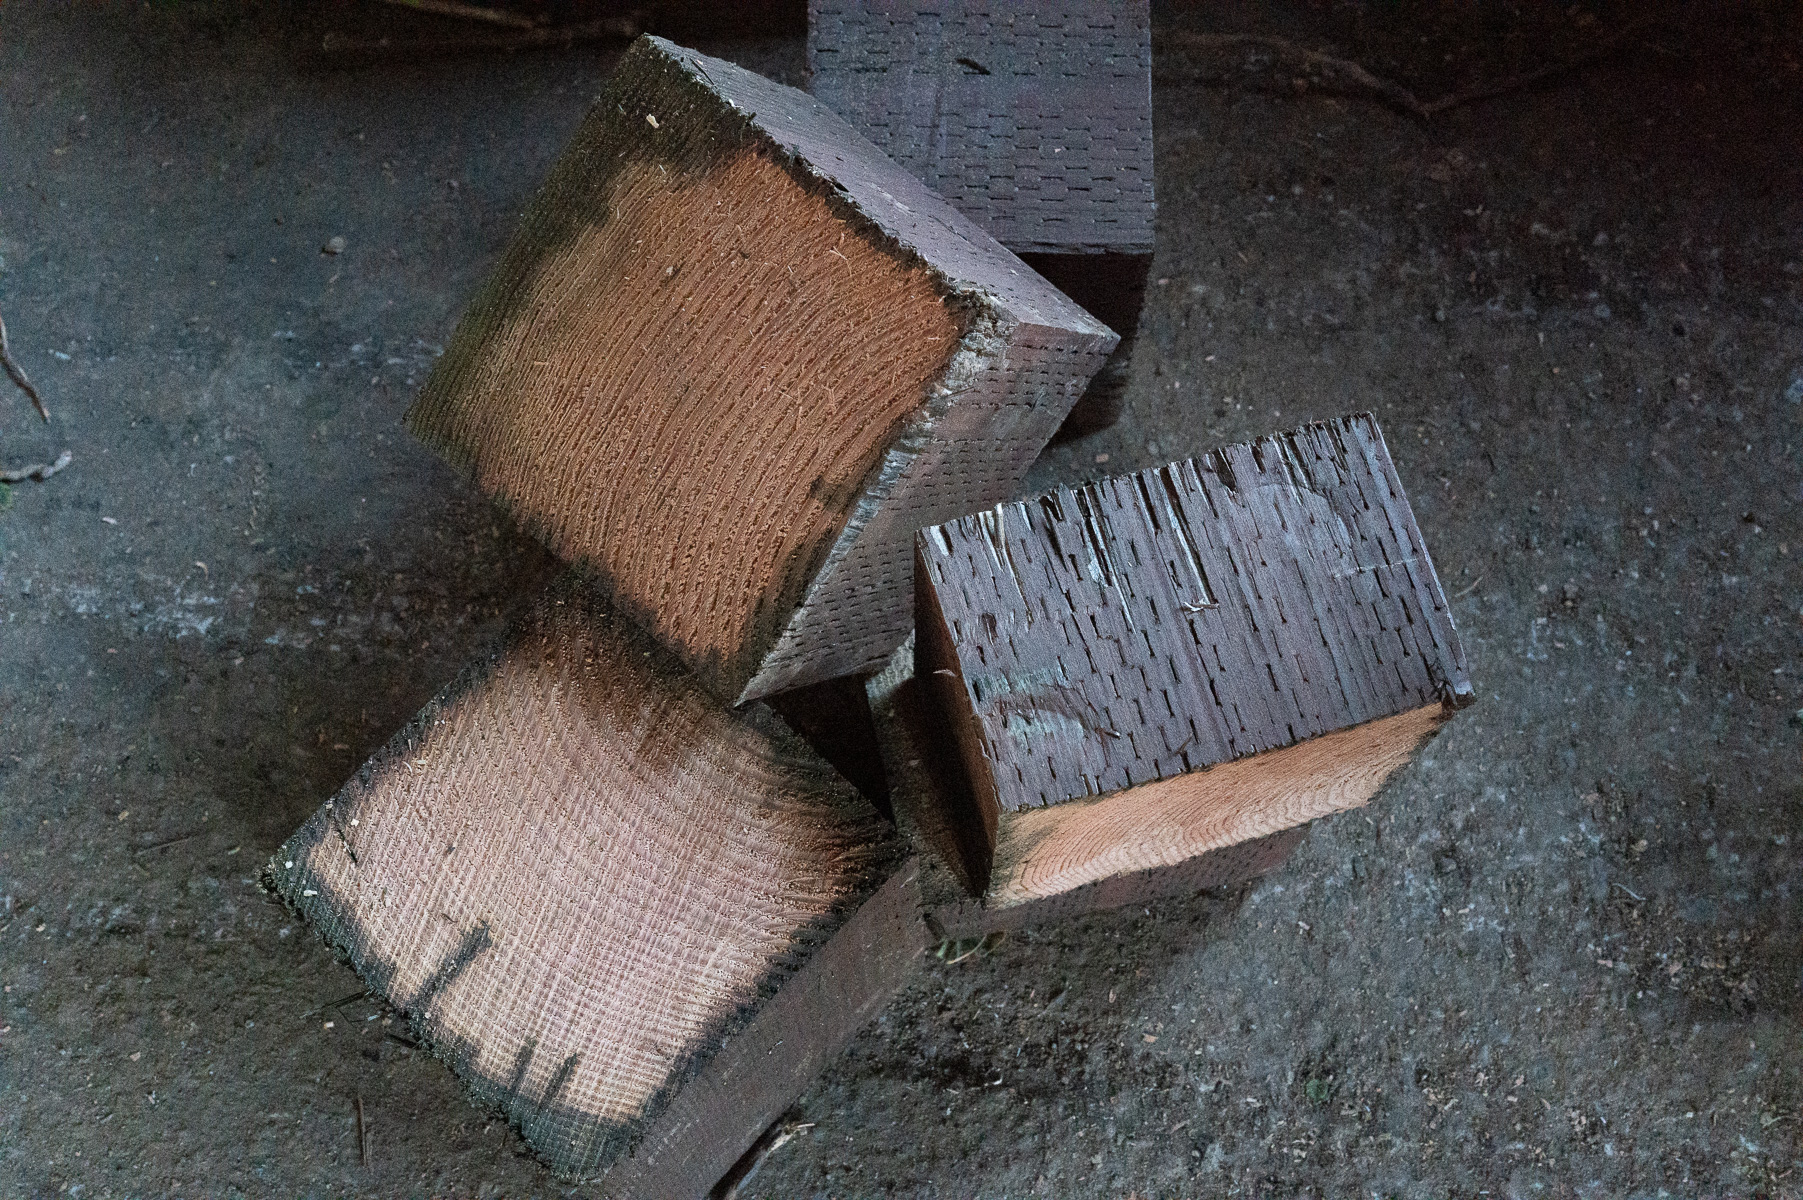
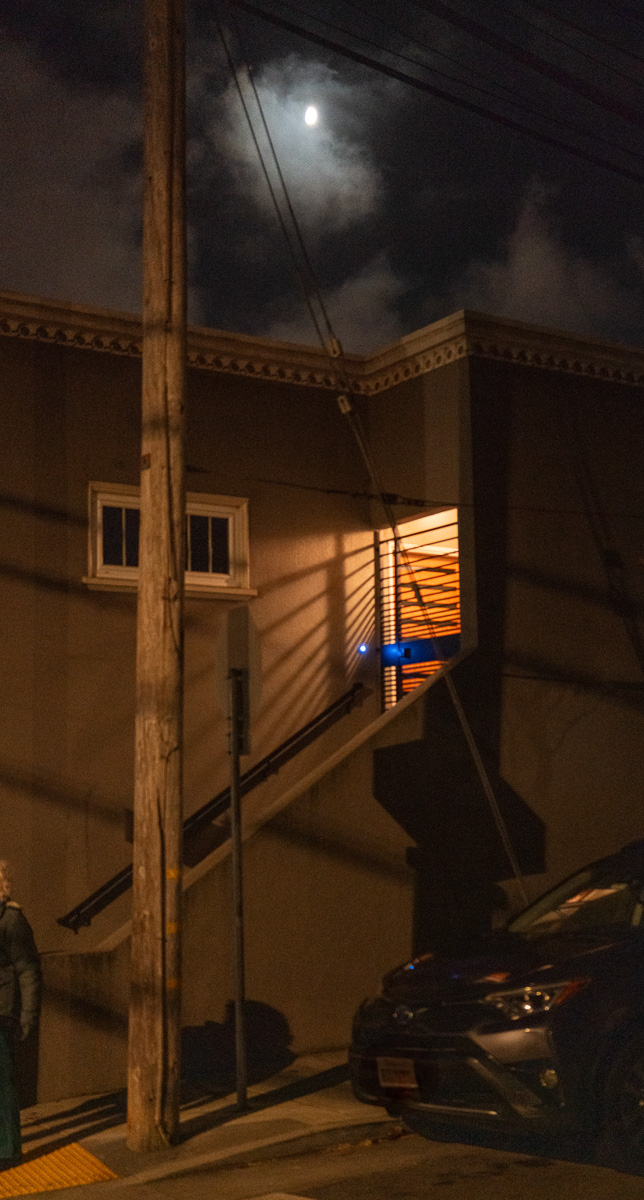
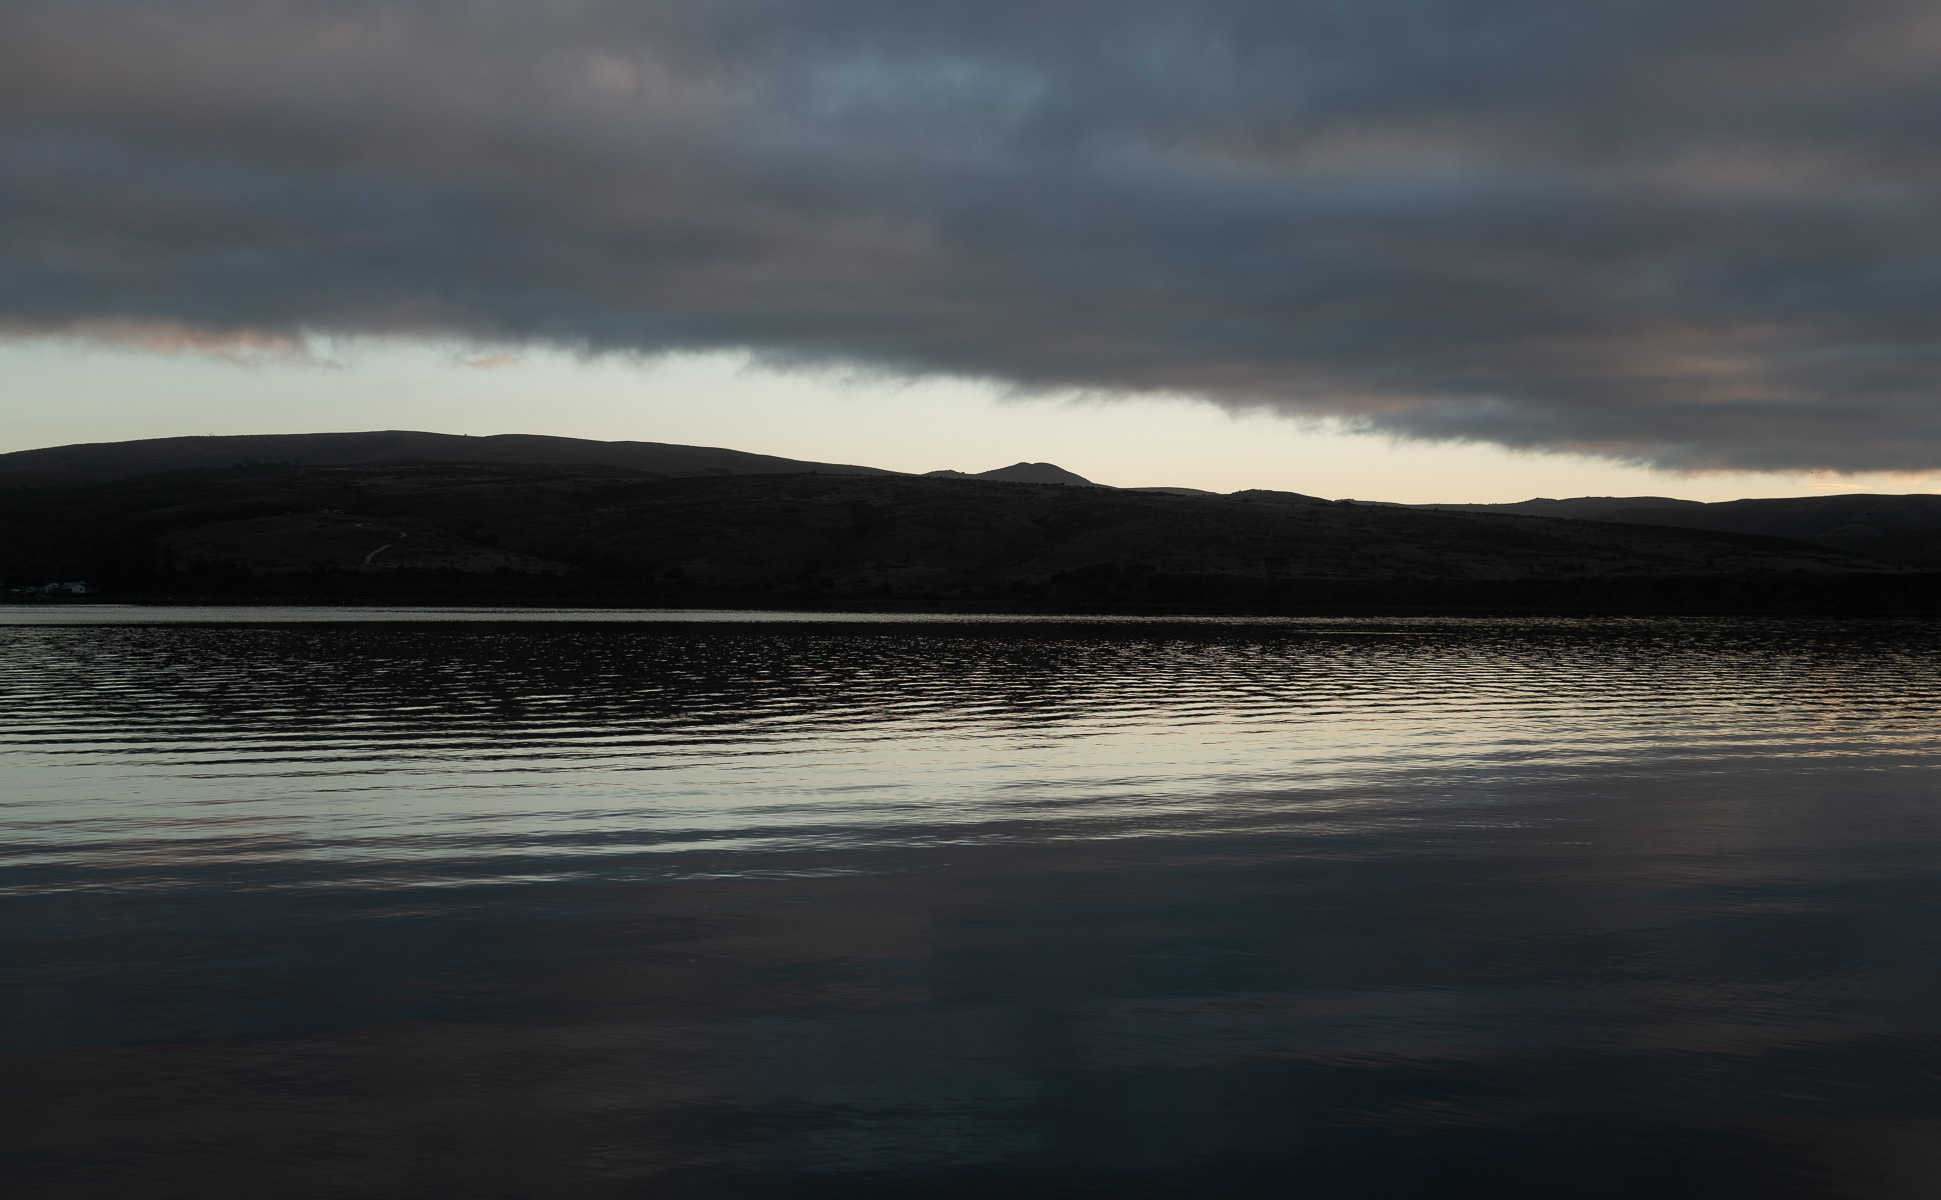
290. Dusk
Acrylic on canvas, 30″ x 24″. January, 2026
Acrylic on canvas, 30″ x 24″. January, 2026
I like to walk in some hills above my house in Los Gatos. I was up there with daughter Isabel, and one winter afternoon we noticed this beautiful oak tree, with the moon in the background. I was able to paint it pretty rapidly, with thick brush strokes, going back to it once or twice to get it right. I used an early version of it as my e-mailed new year’s card for 2026. I considered putting in some flying saucers, but in the end it seemed perfect just the way it was.-
- Finishing your novel provokes mixed feelings. Relief that the long trip is over. Tempered by homesickness, missing the dream world you inhabited for so long. And your beloved or despised characters! Touch to see them gone.
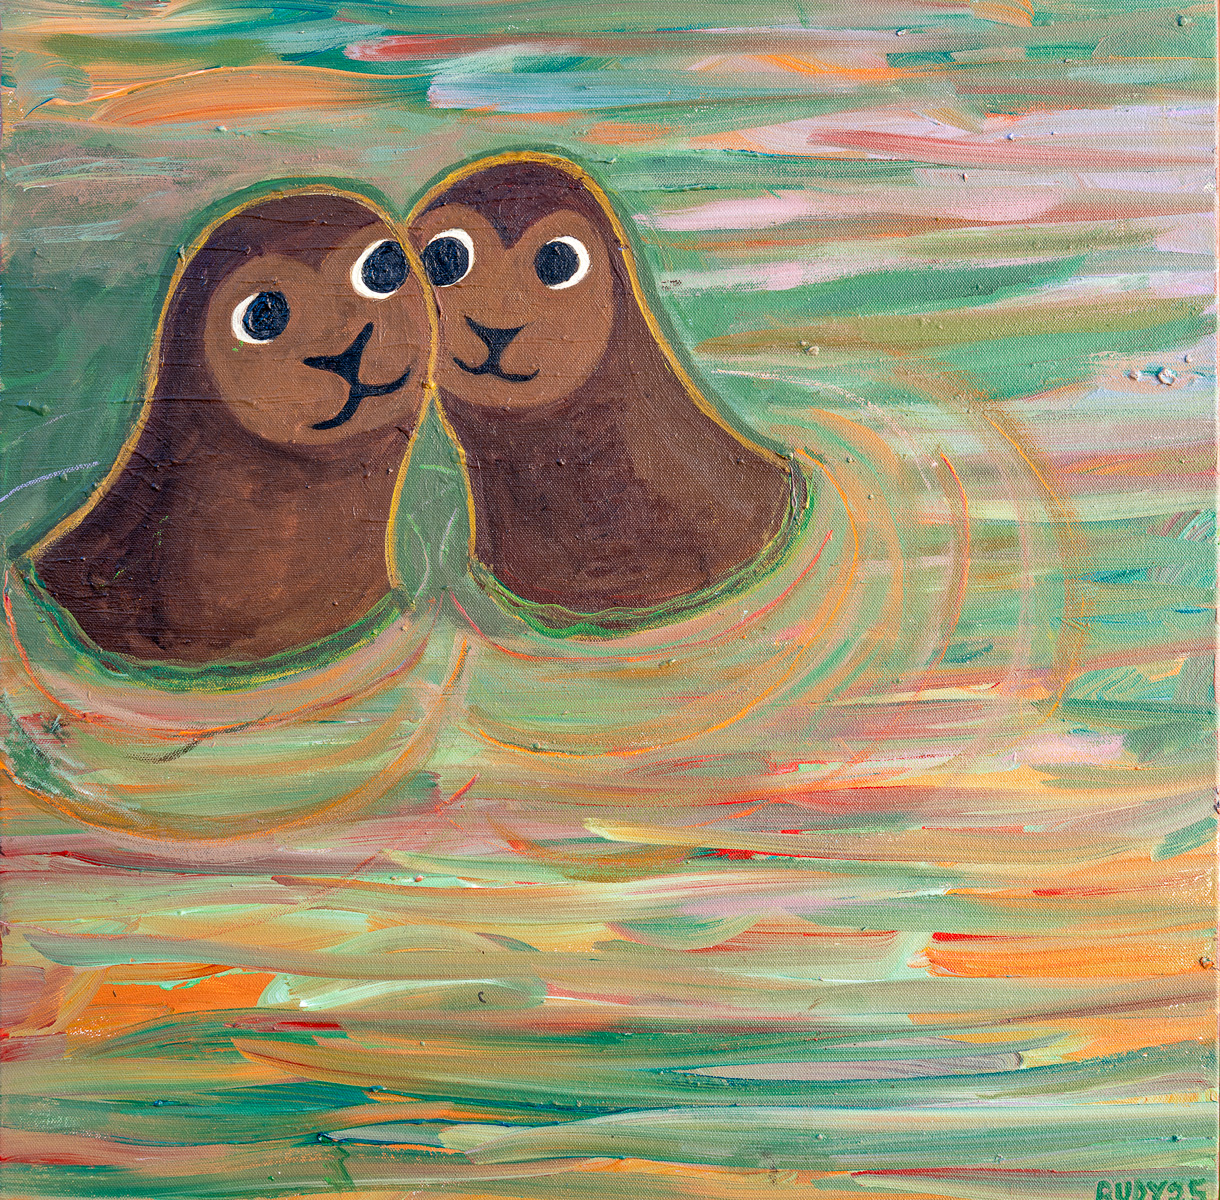
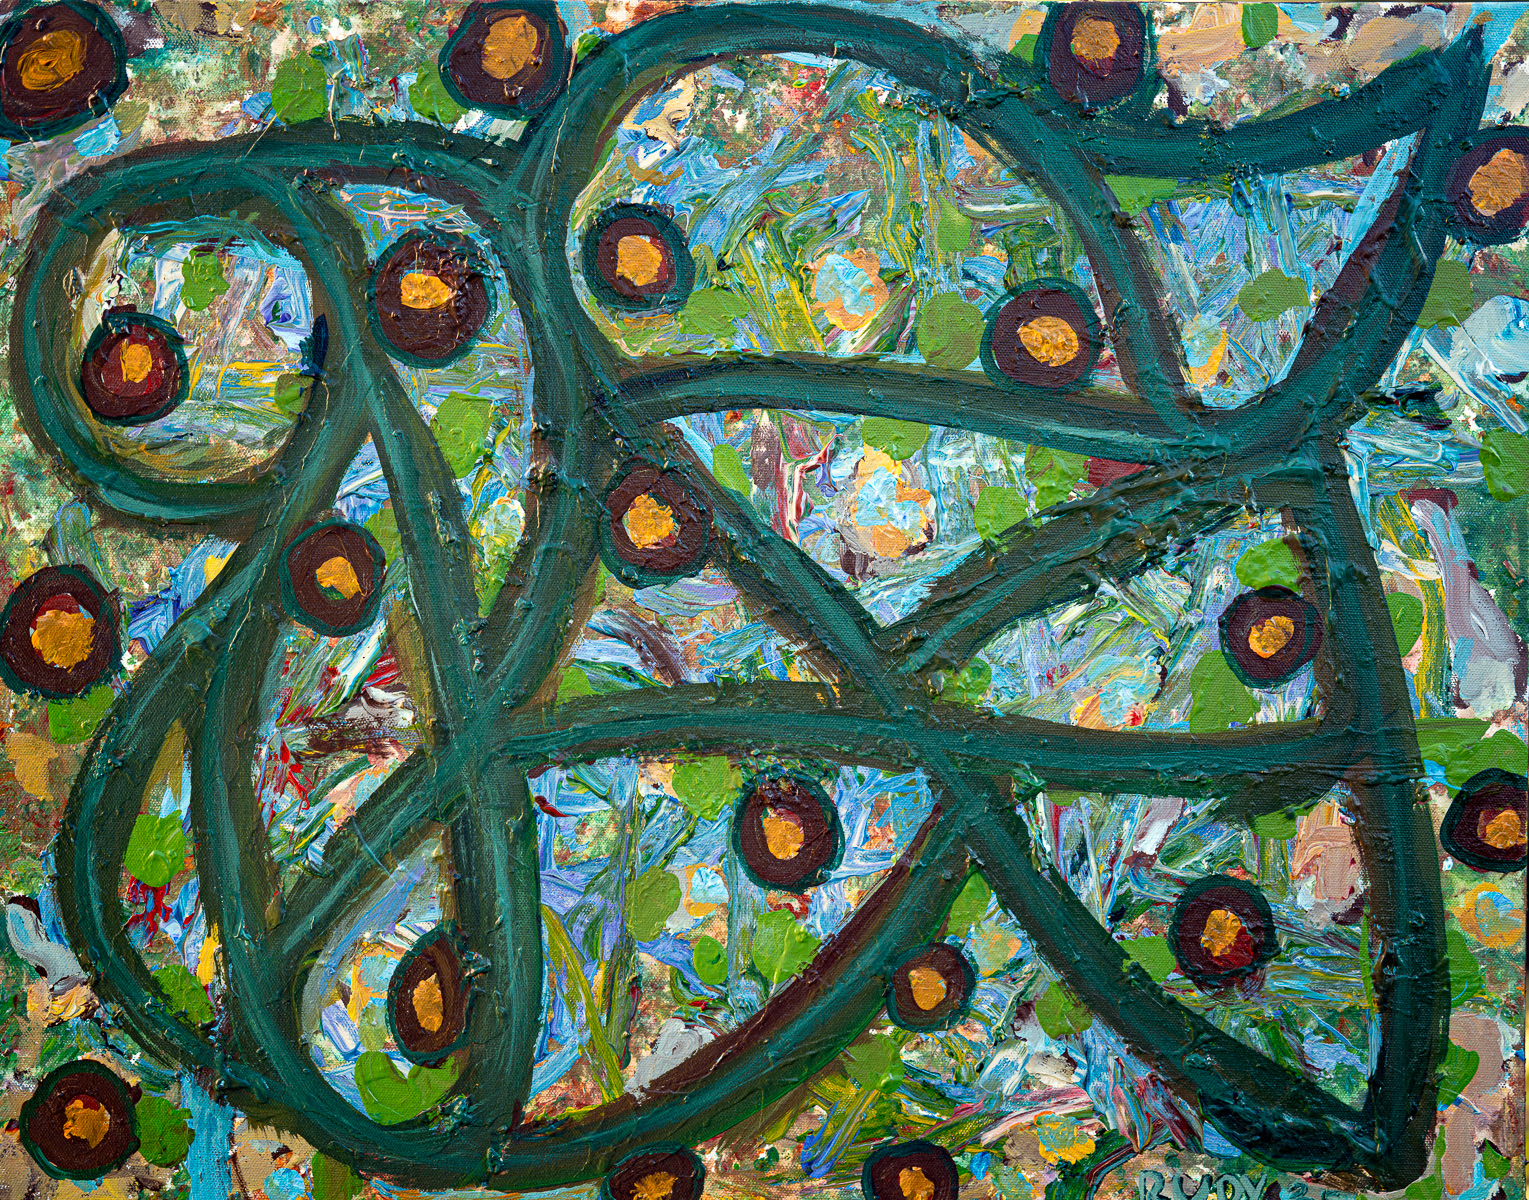
289. Kawaii
Acrylic on canvas, 24″ x 24″. December, 2025
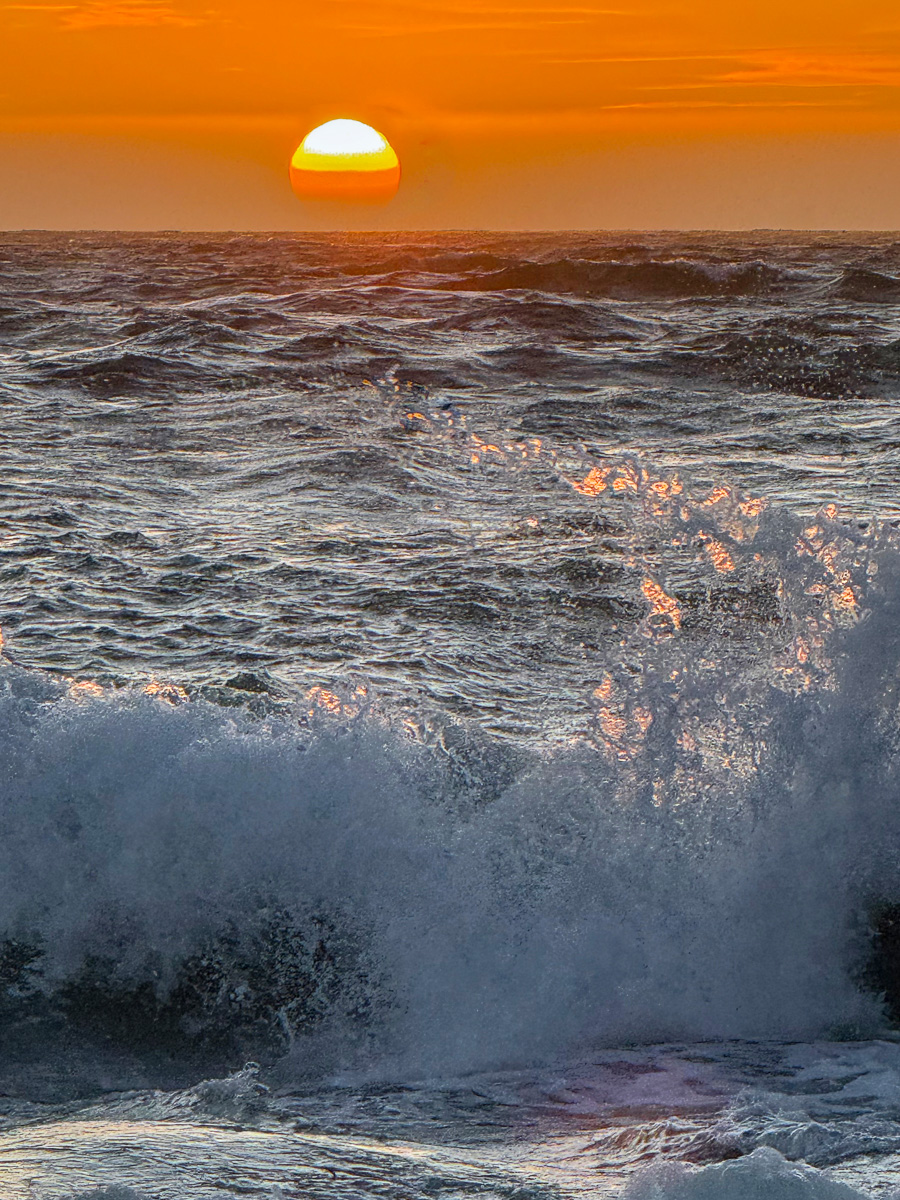
I had a nice square canvas, and a lot of fresh paint on my palette, so I decided to cover the blank canvas with lines. Initially the canvas was in a position where those lines were vertical. It was fun and easy to keep refining the lines with loose, full-armed strokes, using two different-sized brushes. And then I wondered if the painting might be done. I wasn’t sure. But then I rotated the canvas by ninety degrees so the lines were horizontal; and — aha! A sunset. I’d been wanting to paint an ocean sunset. I’d just been on a beach trips with Barb, to Moss Landing, near Monterey. And here was my ocean sunset. But it didn’t have enough. It needed critters. I let the painting sit around the house for a couple of months until I could see them. Seals! I looked at some photos of seals, but, by way of repeated revisions, made mine simpler than life. Cute seals. For the title, I went of the Japanese word “kawaii,” which means something like cute, but in a special Japanese sense. I think it’s pronounced a little like “Hawaii.”
- Painting and drawing. Much less digital than writing. No letters or words. Shades, blobs, arcs. Smeared paint on the palette.
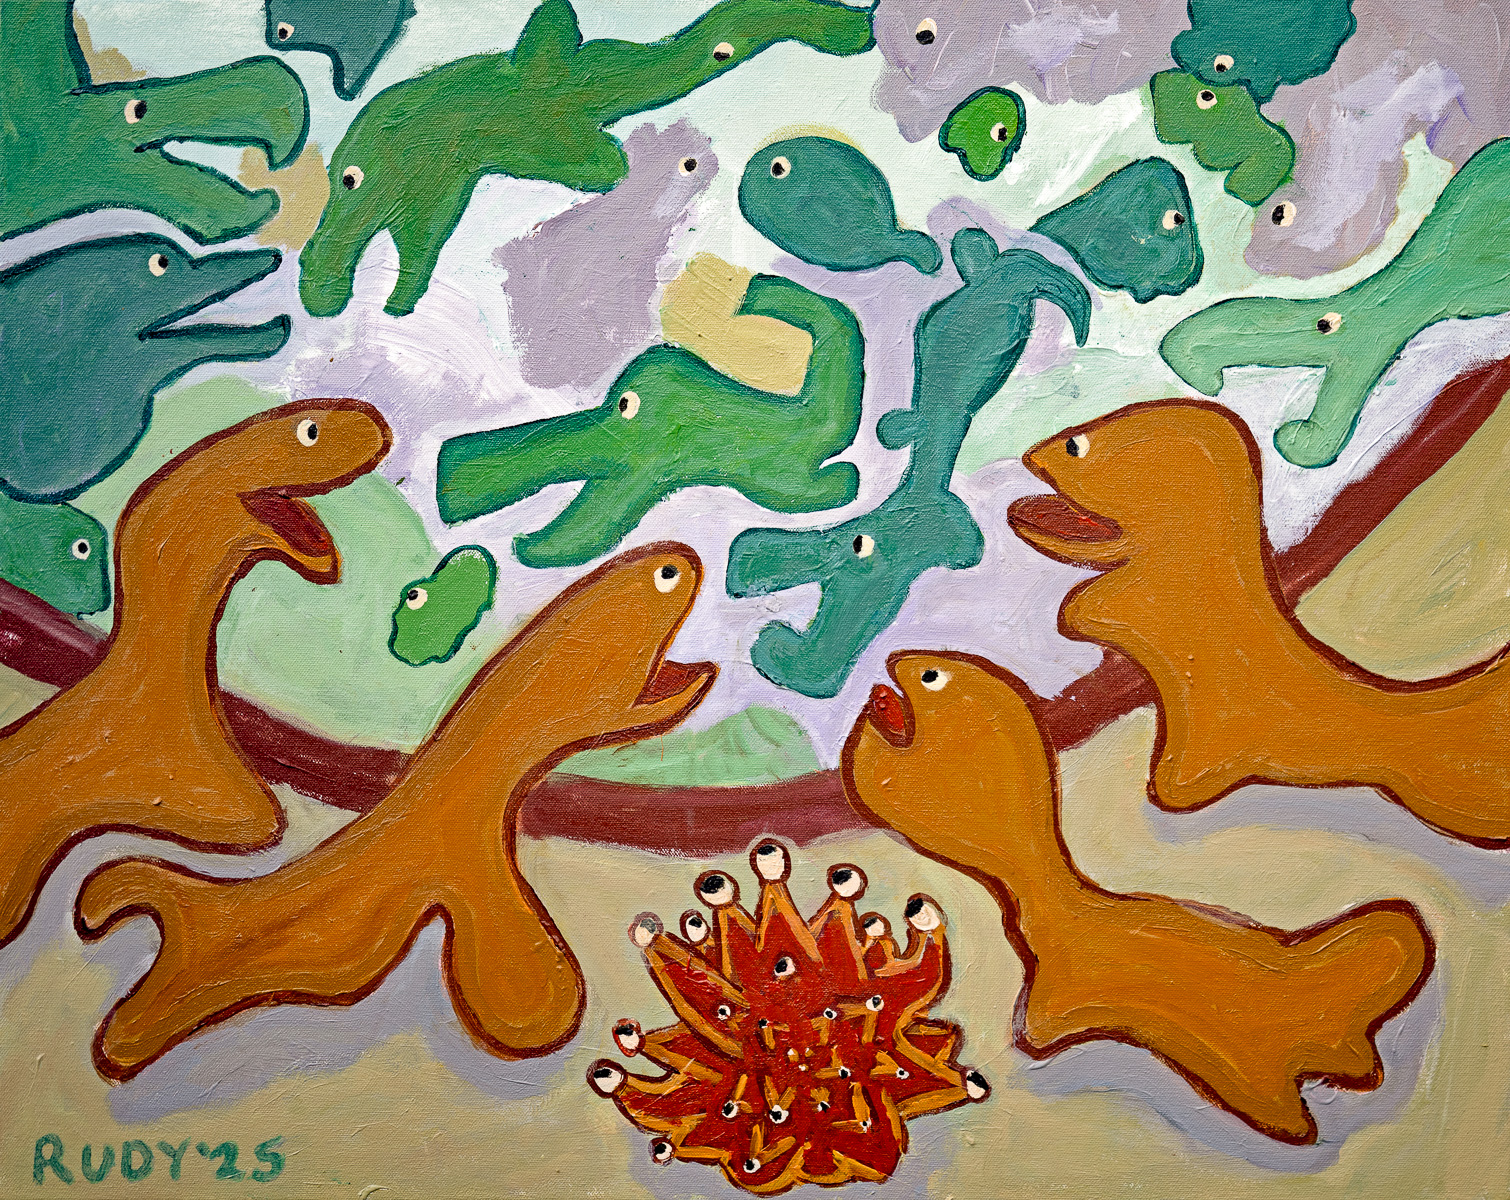
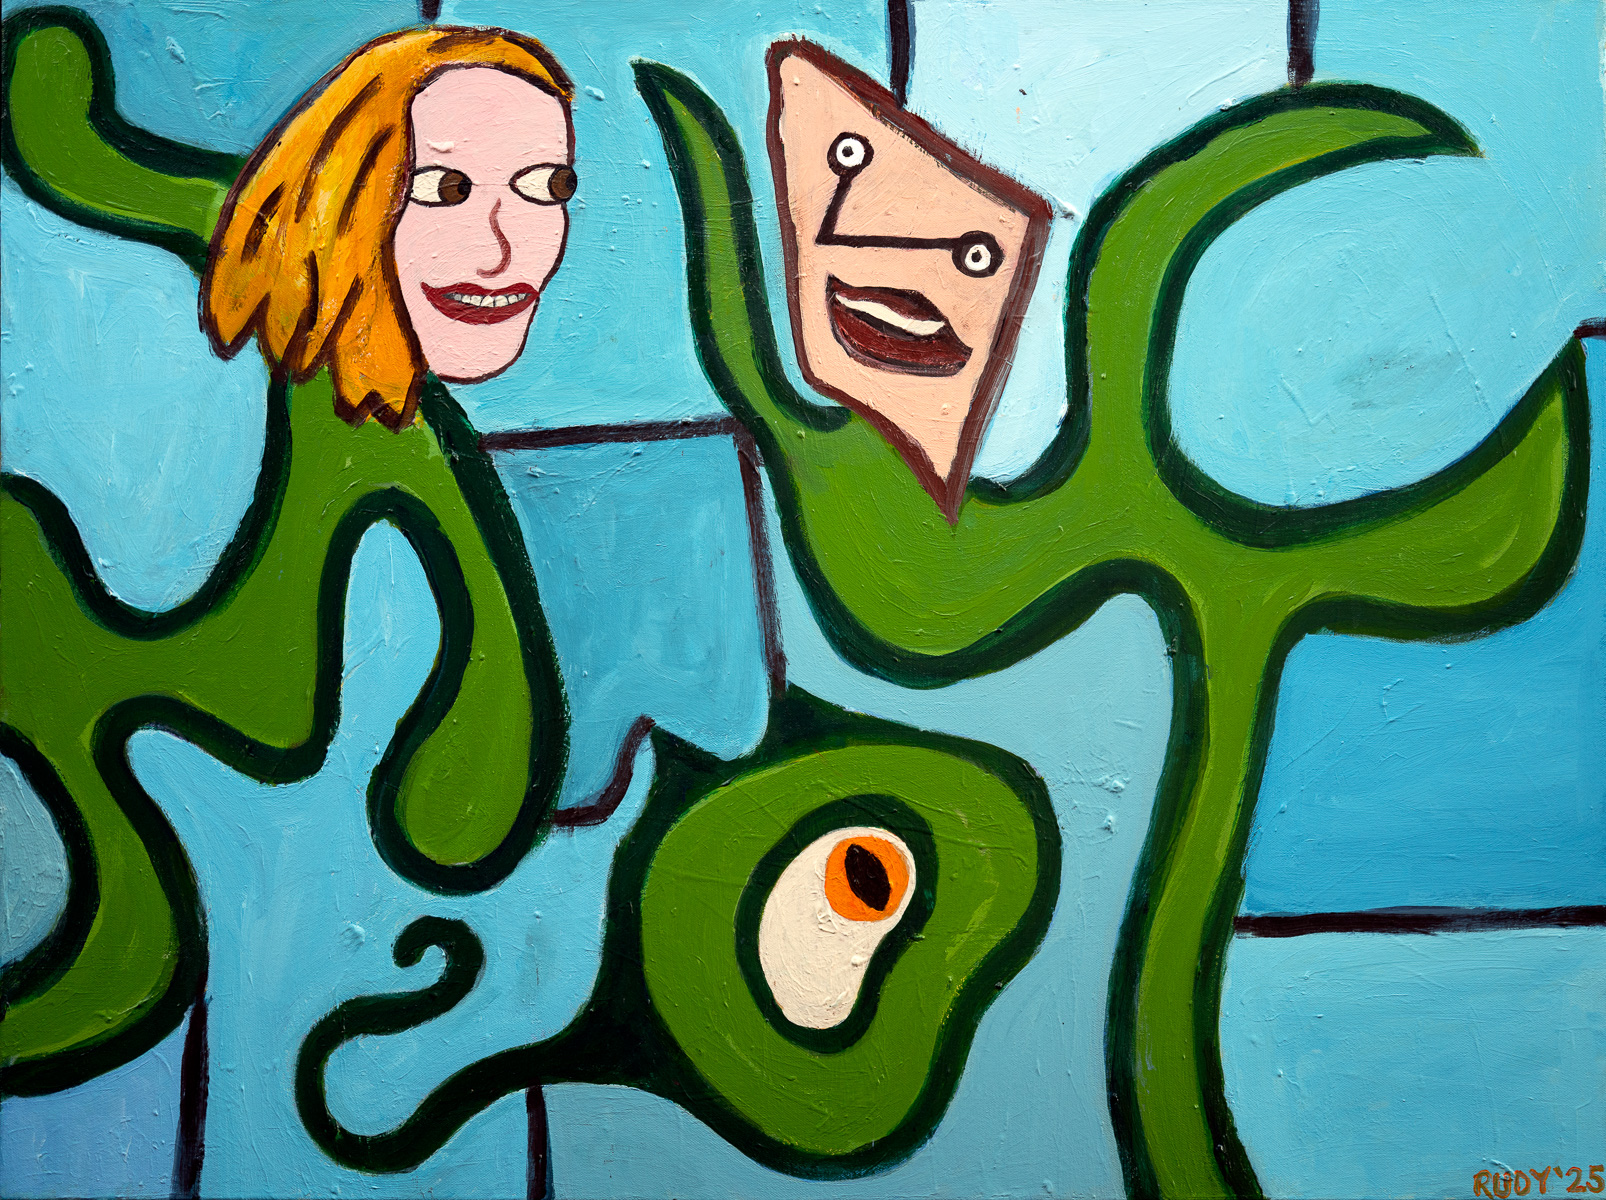
286. New Friends
Acrylic on canvas, 40″ x 30″. October, 2025
I wanted a loose, semi-abstract painting. I wanted a composition where we have some critters at the bottom looking through a door or a windshield, or over a wall, and seeing a different type of critter, perhaps in another world. In New Friends I was initially thinking of a big aquarium tank butted up against a zoo cage, and each group is seeing the others as entertainment. But then I was thinking more of a jungle scene, with two groups in the open air, encountering each other, and hoping to be friends. I used my trick of having the critters emerge like Rorschach test results from blobs I’d made. And I liked the idea of giving almost every one of them an eye. As for the sea anemone or campfire at the bottom, well, that’s an extra I wanted to see.
- Hard to predict. No two eyes look the same, and the curve of the lips escapes conscious control. Ditto for the bodies. You draw what you’re really thinking.
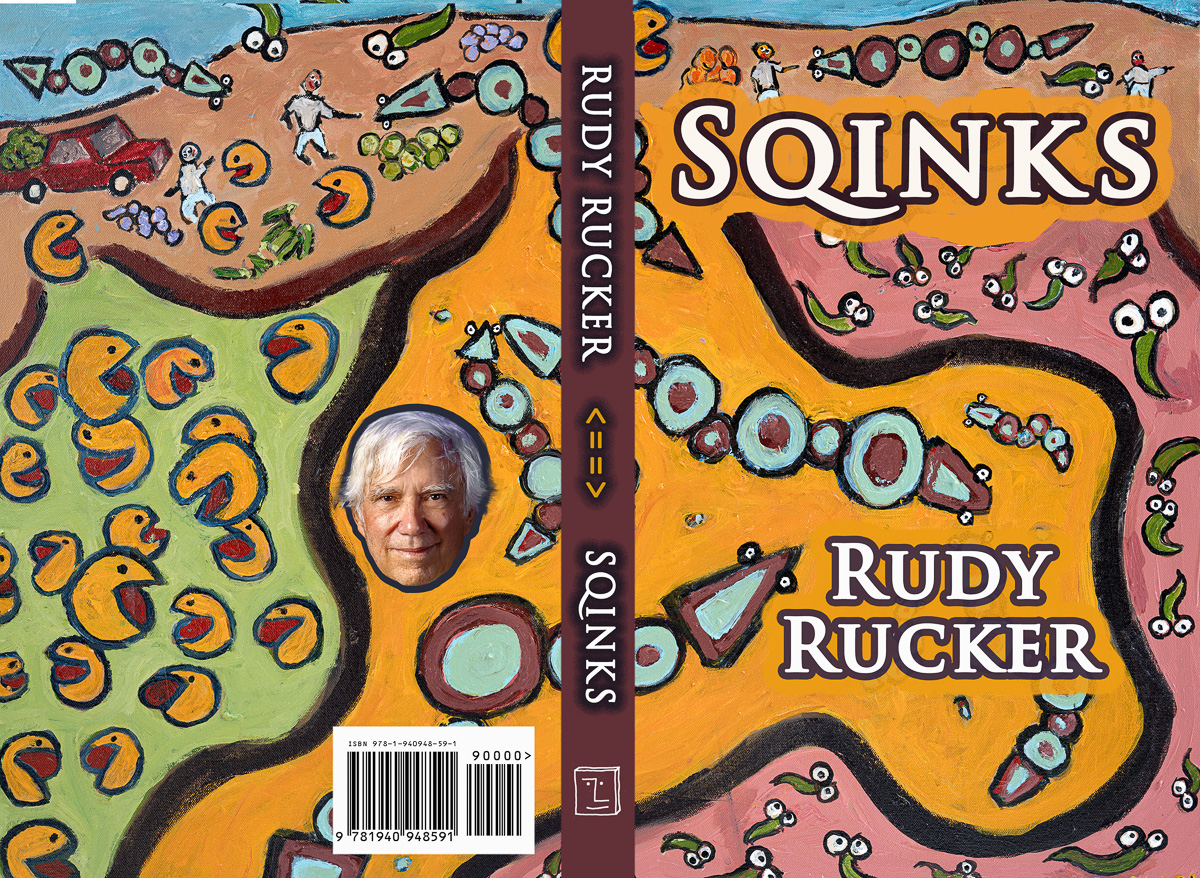
285. The Fall of the Rebel Angels
Acrylic on canvas, 40″ x 30. Oct, 2025
I love Peter Bruegel’s painting, The Fall of the Rebel Angels, a fantastical and realistic masterpiece that shows a hundred misshapen creatures tumbling down from heaven. I was working on my novel Sqinks, with a zillion odd aliens are swooping around. I thought of Bruegel’s painting, and I tried to paint a copy for inspiration. But that’s far beyond my skills. I went abstract, and filled a canvas with gauzy figures in shades of green, pink, yellow, blue, and orange. One is indeed modeled on a Bruegel fallen angel. It’s is halfway up of the left, and resembles a bursting seed pod. I showed my first version of the painting to my artist pal Vernon Head, and he said, “This is great, it’s like a Willen de Kooning, you should leave it just the way it is.” I was happy he said that, but I was tempted to keep going, and to start outlining things, the way I like to do. As a compromise, I only outlined the figures in the lower part of the painting. I see those guys as the creatures who are allowed to remain in heaven, and the evicted ones are the gauzy figures in the upper half. I see them as farther away, and in motion. The red arc across the canvas might be the edge of a cliff, or the rim of a planet. Or maybe it’s the lower edge of a UFO’s windshield. So our viewpoint would be with the aliens in the cockpit. Mathematical logic, right?
- Painters lesson for writers: you can always paint something over. And do it again. No loss here. Bumps show through, and hints of colors. Same with writing, because you know what’s underneath.
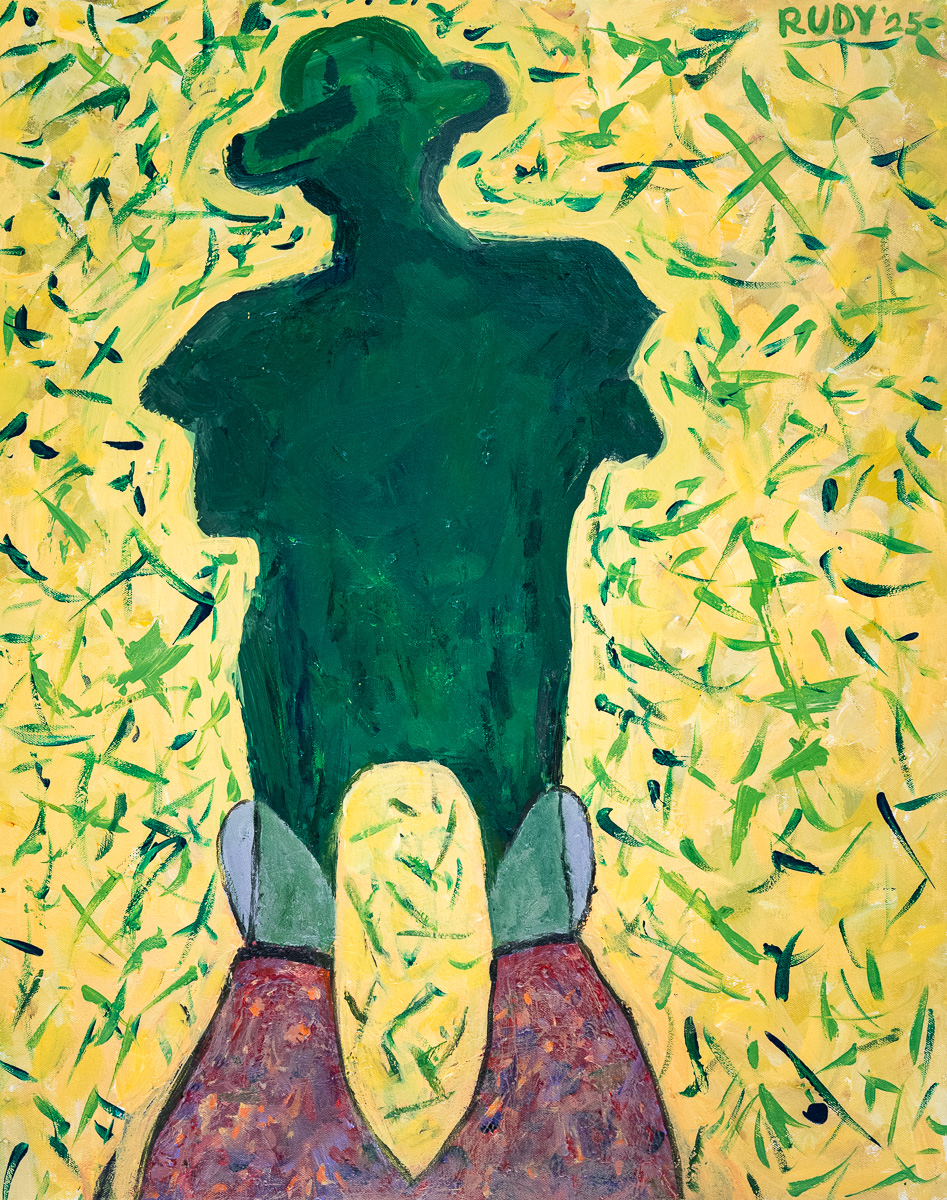
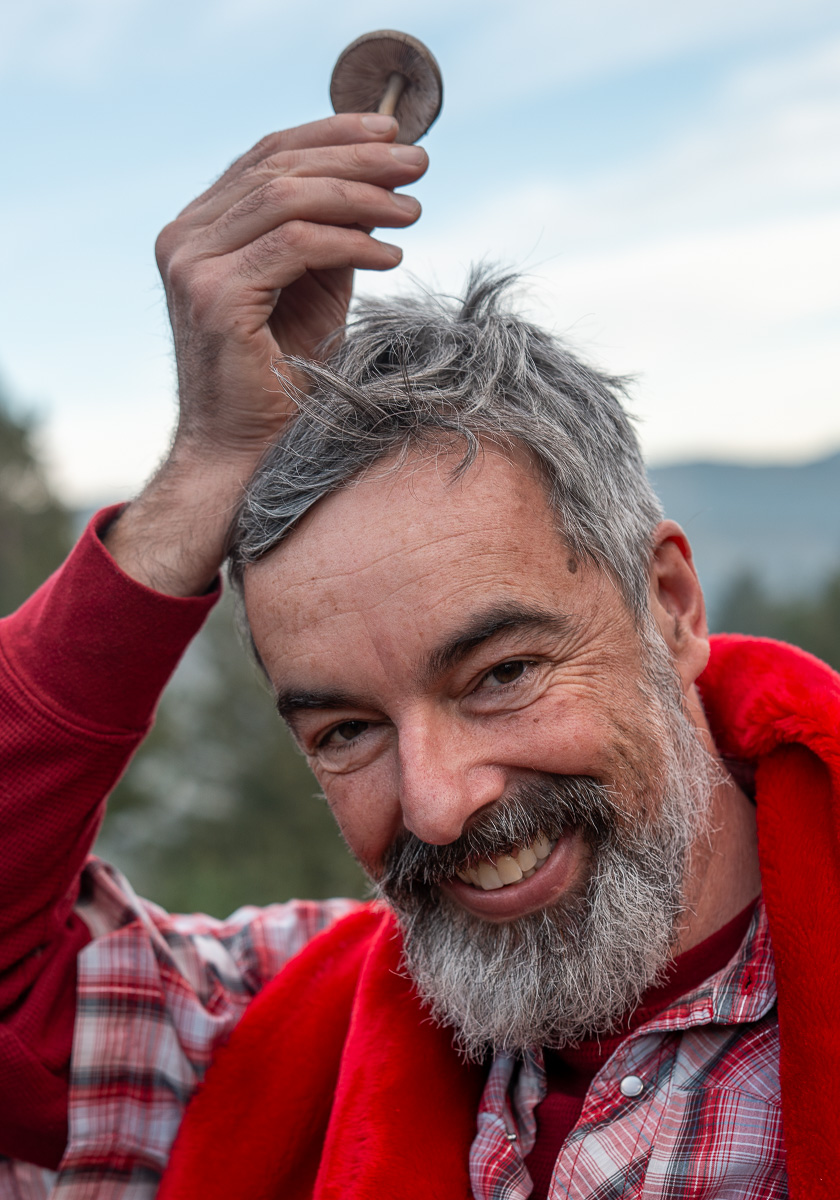
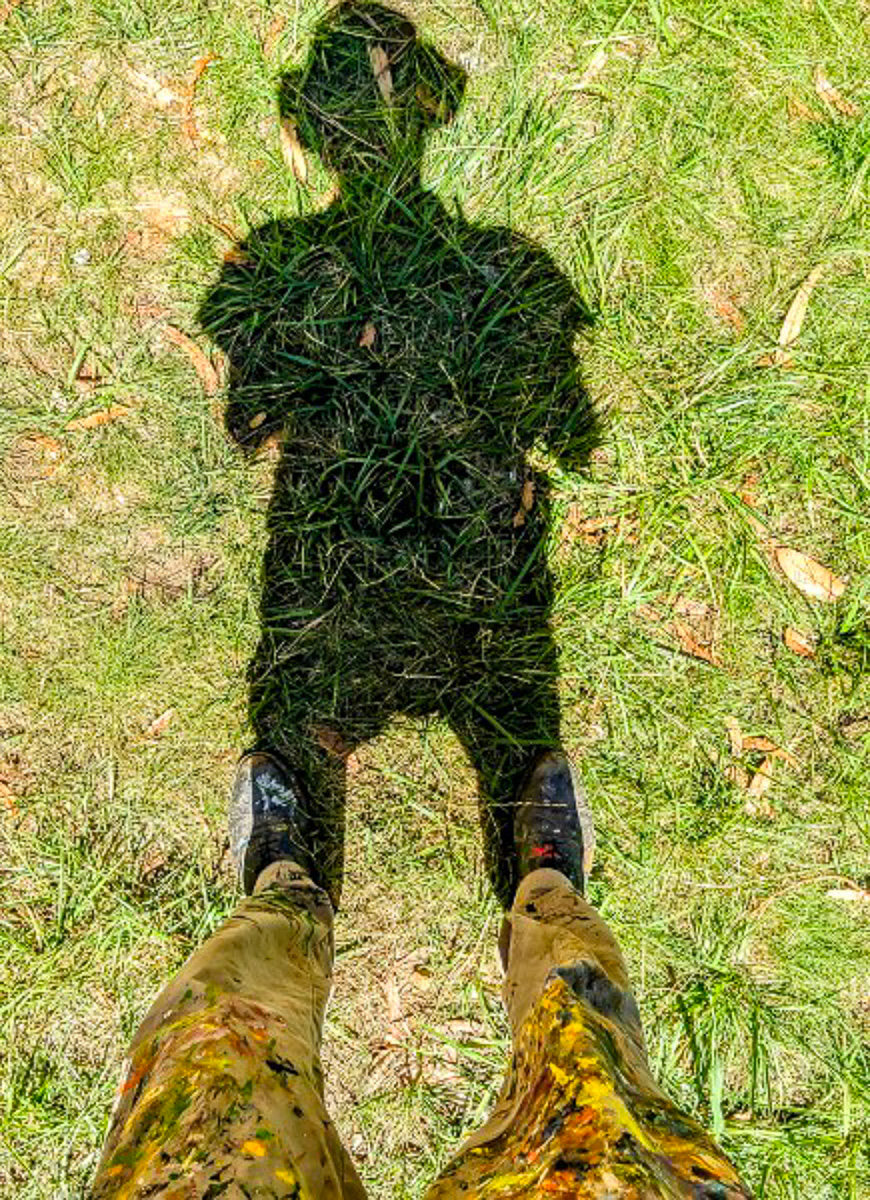
284. My Shadow
Acrylic on canvas, 24″ x 30. July, 2025
Here I am in my studio, that is, in my parched back yard. The sun is high overhead. Thei summer-nuked lawn is yellow, with dead straw and few green blades. I’m holding my phone camera with both hands, with my elbows sticking out. You can see my lower legs, my shoes, and the short, dark shadow of my body. My pants have smears of paint on them. The articulation of the legs, shoes, and shadows is a bit tricky but, once you know what you’re looking at, it seems logical. At least to me. I have a PhD in an arcane field knows as Mathematical Logic. The other day I was talking with my friend Barb, and I was making some outrageous claim, and I insisted, “It’s simple logic.” And then I had to stop and think, and I admitted, “Well, it’s mathematical logic.” Which is not the average person’s notion of logic at all.
- How do you know when a book is done? When you stop! And at some point you’re waiting for a spot where stopping is possible. A place where you can jump out of the boxcar door and roll down a soft bank. Bye, train!
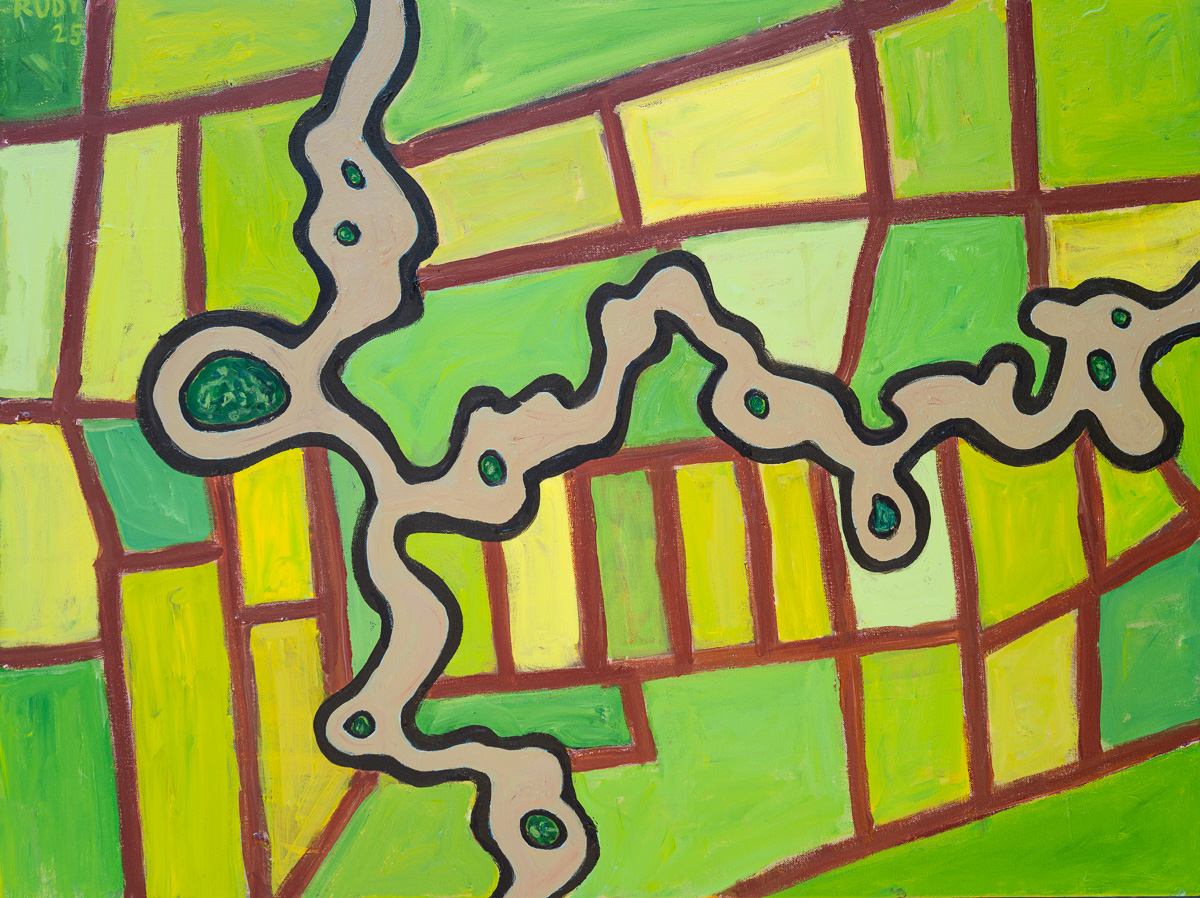
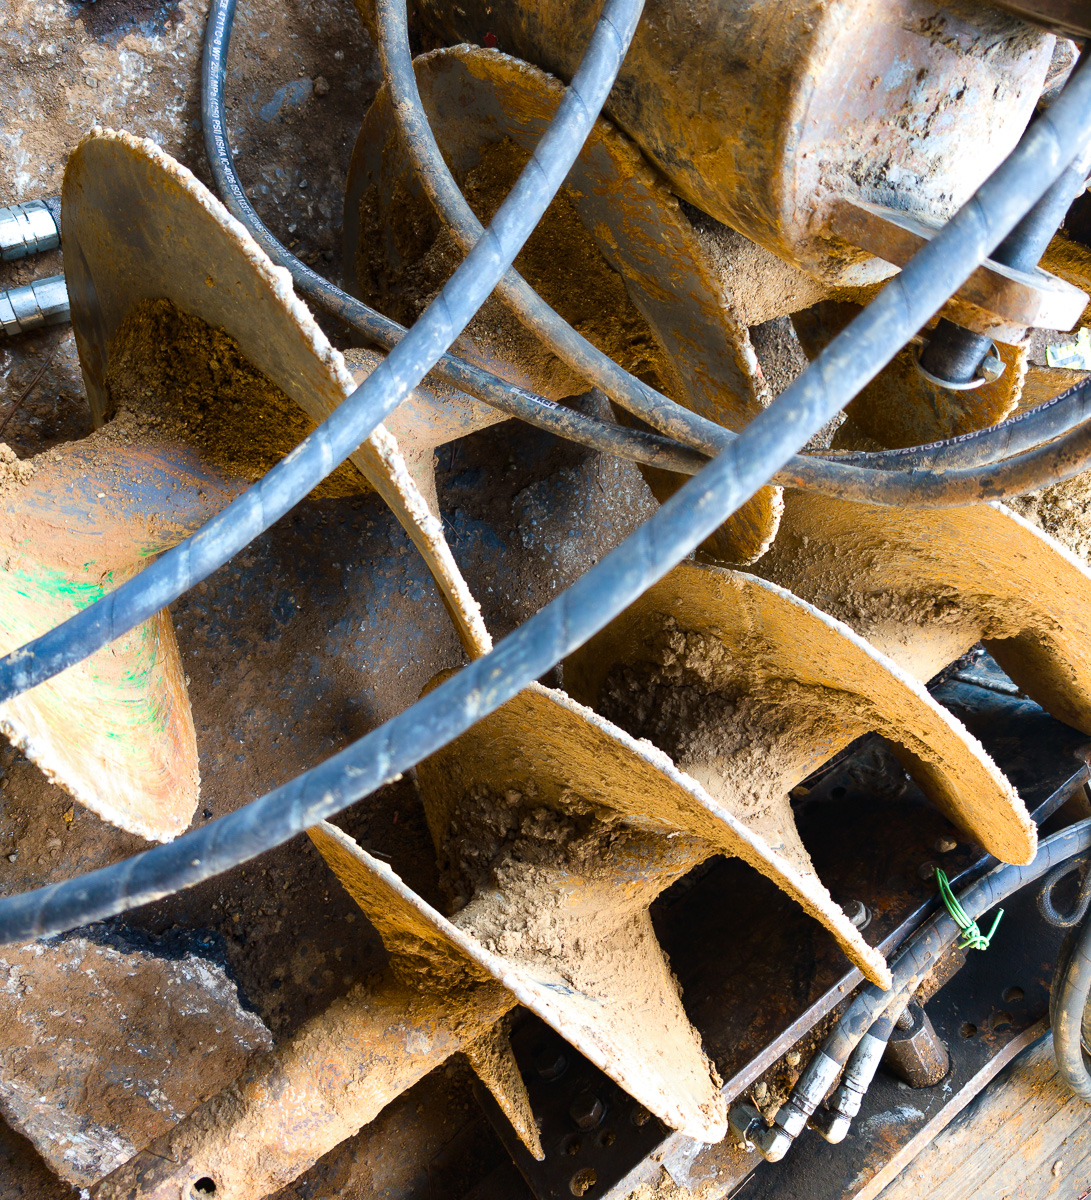
2282. Oxbow River
Acrylic on canvas, 40″ x 30. June, 2025
I saw this view from a plane while flying east from San Francisco and passing over the Sacramento–San Joaquin River Delta. The multifarious winding streams in this area have oxbows, that is, bulges where the river may or may not pinch off into an oxbow lake. Fan of gnarl that I am, I love looking down at this area from a plane. The great modern California artist Wayne Thiebaud painted this region many times. It’s an inexhaustible motif. One thing I like here is the contrast between the orderly polygonal fields and the twisty river streams¬¬—mirroring the split between digital and analog, computer and soul, word and image. Gnarly, dude.
- Painting is a little different. It looks perfect after five minutes. But you bought all that paint and the big canvas, and you don’t want to give short weight. So paint more and, quite soon, you find you’ve ruined it.
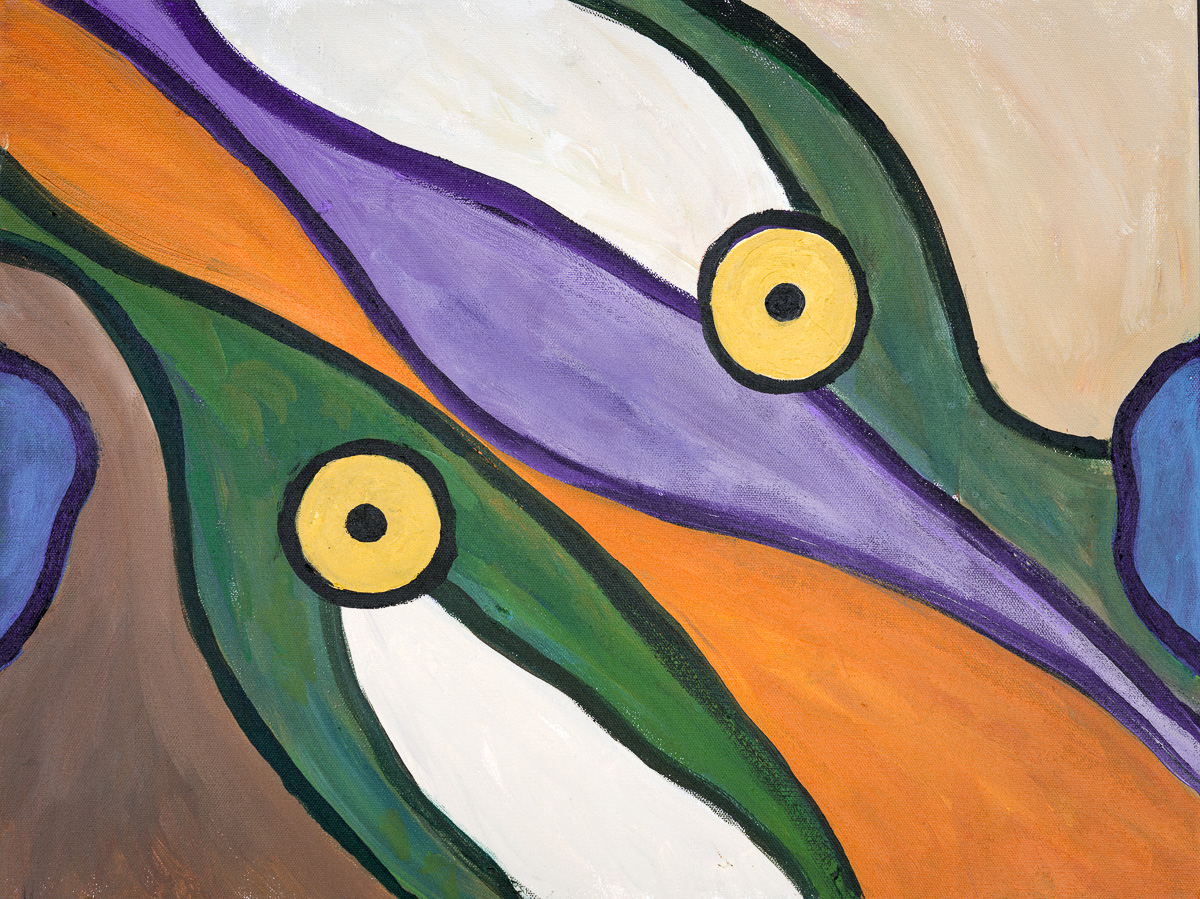
281. Hvalfisk
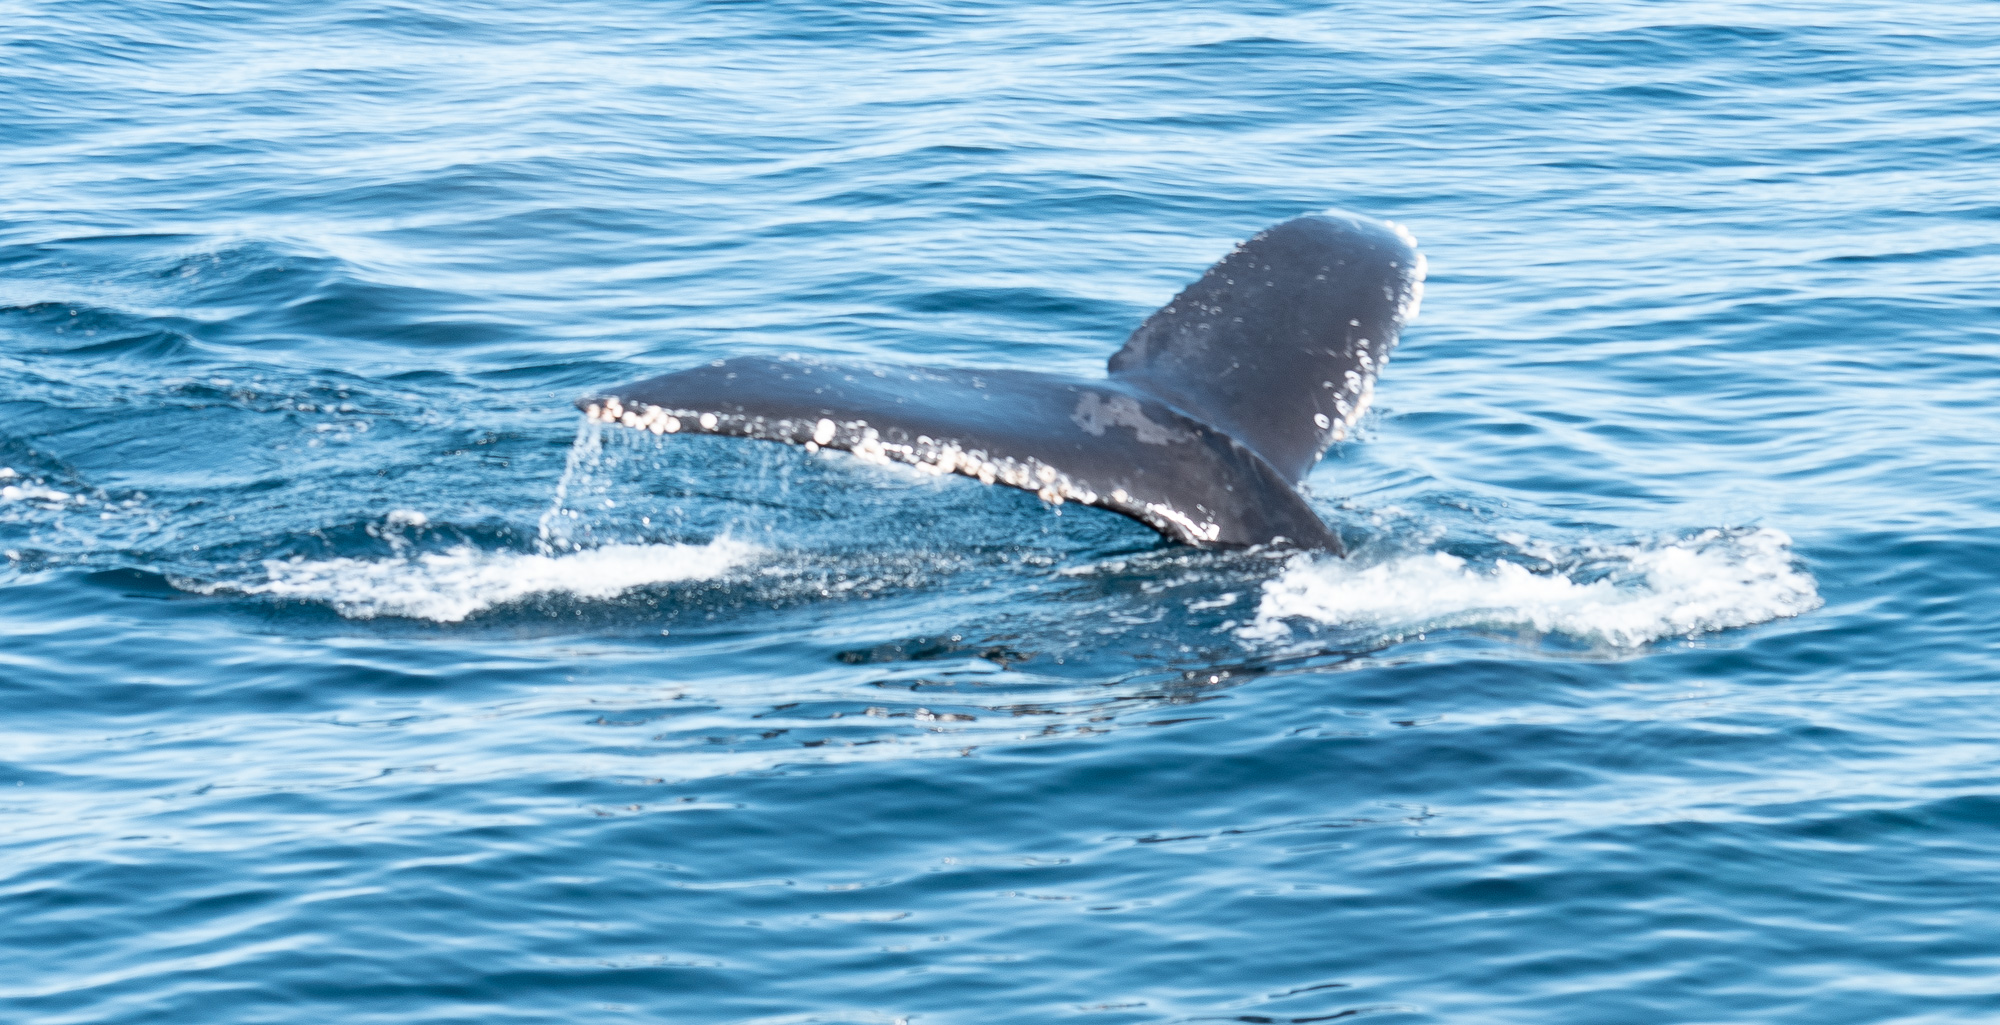
Acrylic on canvas, 24″ x 18. June, 2025
Abstraction. Color harmony. I added the two eye-circles at the end. I always like painting eyes and flying saucers and tentacles. And once the first eye was in place, I was thinking of sea creatures or, more specifically, whales. The title? In Norwegian, “hvalfisk” means “whale fish,” or simply “whale.” And this happens to be a word I sometimes like to yell when I’m alone on the beach, using the accent of my Norwegian friend Gunnar.
- You take a day or two off, sadly glancing at the broken painting. But one morning you go at it again. And now you’ve fixed it! A rush of invention. Everything’s clicking.

278. The Lovers
Acrylic on canvas, 30″ x 24″. May, 2025
I’m imagining a pair of lovers spiraling down¬—a cosmic gateway? Ecstasy? Who knows. They look like they’re getting a little smoother on the way down, like rocks tumbled in the sea. I like the way the two lovers are cruising along. I did the yellow background with finger-painting, an effect I sometimes use. That is, I squirted blobs of four different yellows and smeared them around, wearing my latex painting gloves. Getting the right reds and blues fort the lovers took me some time. Shade, saturation, and value¬—all three have to be harmony. Another challenge for The Lovers was to get the geometry right! I would say they’re moving along a helix that has increasing torsion—in the sense of being more and more stretched out, like a Slinky being pulled straight. I worked it out by eye, with plenty of do-overs.
- And the next day…and you ruin it again. And then fix, and ruin, and fix. Over and over, until there’s nothing left that bothers you when you look at it. No snags where your eyebeam catches.
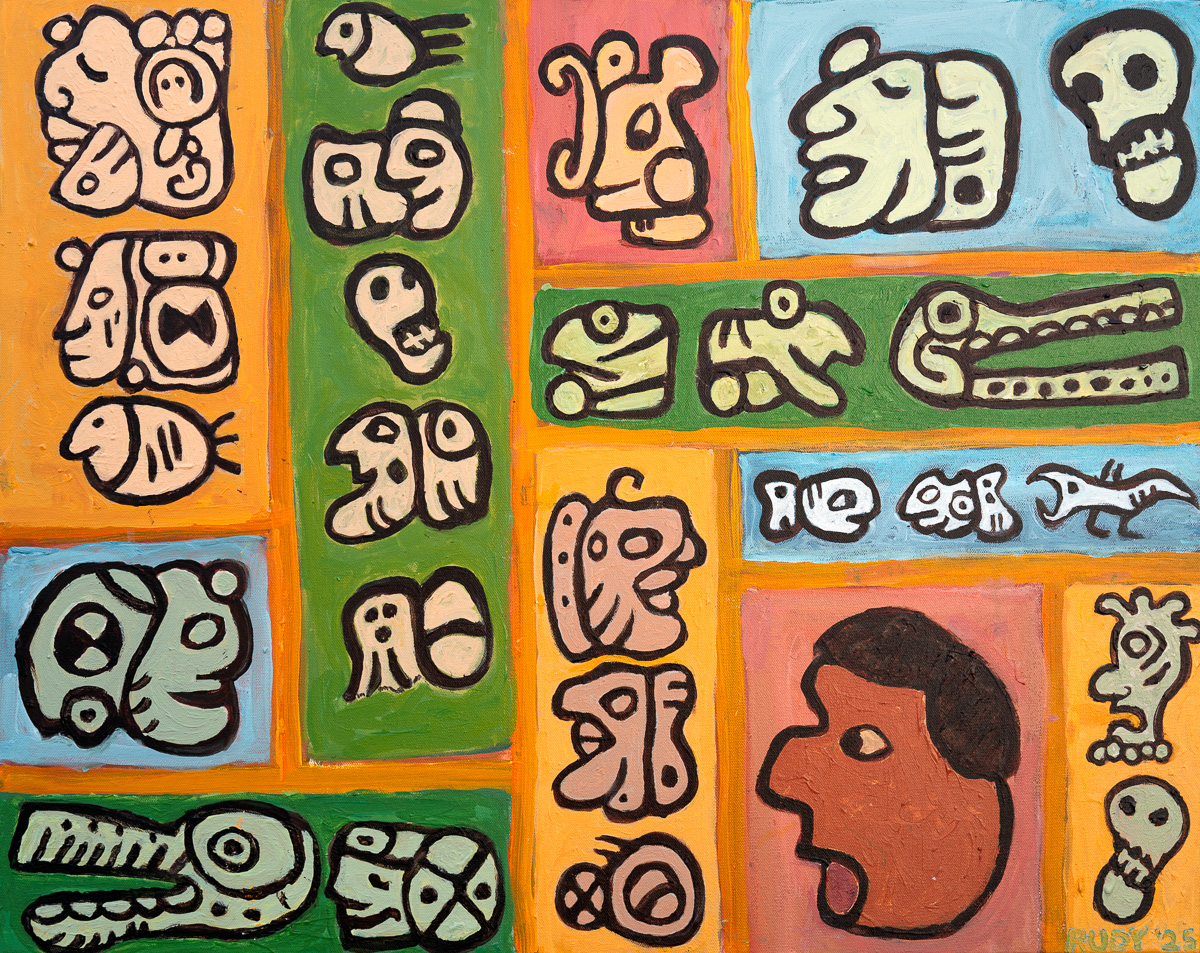
275. Mayan Codex
Acrylic, 30″ x 24″ canvas. February, 2025
My friend Barb and I took a vacation trip to the Yucatan in Mexico. The beaches and skies and towns and jungles were amazing. Everyone was nice. We spent a day at Chichen Itza which made a huge impression on me, with its big square-topped pyramid and its many glyphs with Mayan pictographs. I knew I wanted to paint these. Barb and I took photos. I felt like we were cosmopolitans in a Fellini movie. Back at home I found a couple of websites with simplified images of the pictographs. I wasn’t sure how I’d use them, bus I just started, and kept going, and this is what I ended up with. I like it a lot, and it made me happy to work on it . Generally all the people in Mayan pictograms face left, but I turned a couple of them around for variety. And I put in a couple of snakes or crocodiles. The Mayans have an important plumed serpent god, Kukulkan. And they love depicting skulls. I used the cool word “codex” because there exist some illustrated documents illustrating Mayan and Aztec temple art. My beloved beatnik author William Burroughs revered these records.
- Writing seems like it has a message, but does a painting? The two modes are channels you broadcast on. Talking about yourself, or things you’re worried about, or thinks you love, or simply thing that caught your attention.
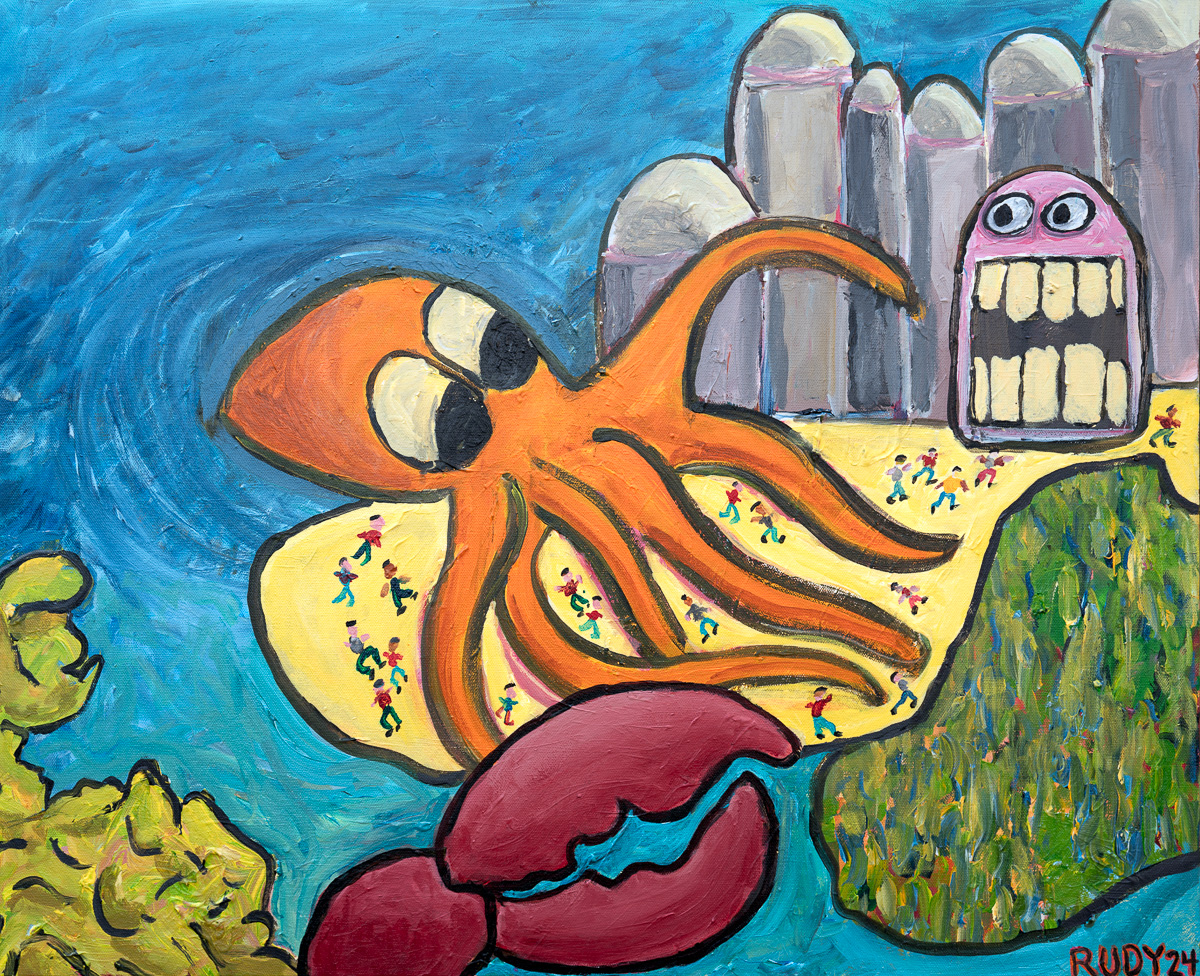
274. Scary Beach
Acrylic, 30″ x 24″ canvas. December, 2024
I don’t remember exactly what got me started on this painting. I guess I wanted to do a painting, and lacking any better idea, I decided to go for a giant tentacled creature from the sea. With tall buildings on the beach, like you might have at Miami. With an alien attack scenario. And then my big brother Embry was suddenly dying of cancer. It came on very quickly. I flew back to Louisville, with my son Rudy Jr. along, and we had a chance to say our goodbyes to Embry. He was very weak. It was good to be together. I held his hand for a long time, and he told me his whole life was flashing before his eyes, bouncing around, and he liked that. So strange and sad to reach this milestone. Embry and I were little boys together, seventy-five years ago—and now I thought of us as little boys in the woods with something scary drawing near. The day after I got back to California, Embry was dead, and I went back, this time with daughters Georgia and Isabel. It was a big funeral, with many familiar faces from the old, old times. I got it together to deliver a eulogy. Back home I didn’t know what to do with myself. I picked up my half-done painting and finished it. That gravestone monster with the big teeth emerged, and it made sense for me to paint that. You might say it’s Death itself.
- When it gets good, the painting or the writing, when it get goods the world begins to dance with you.
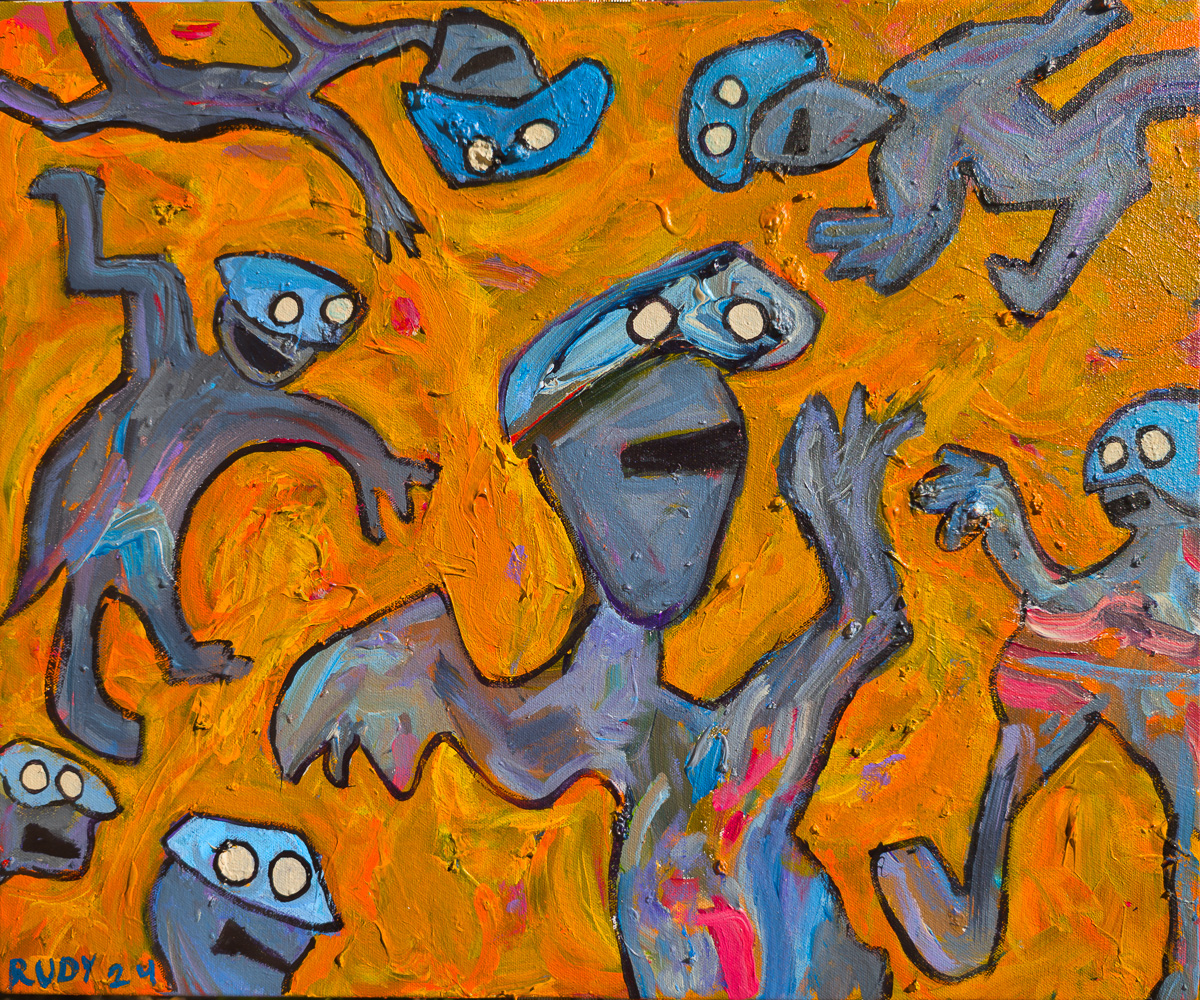
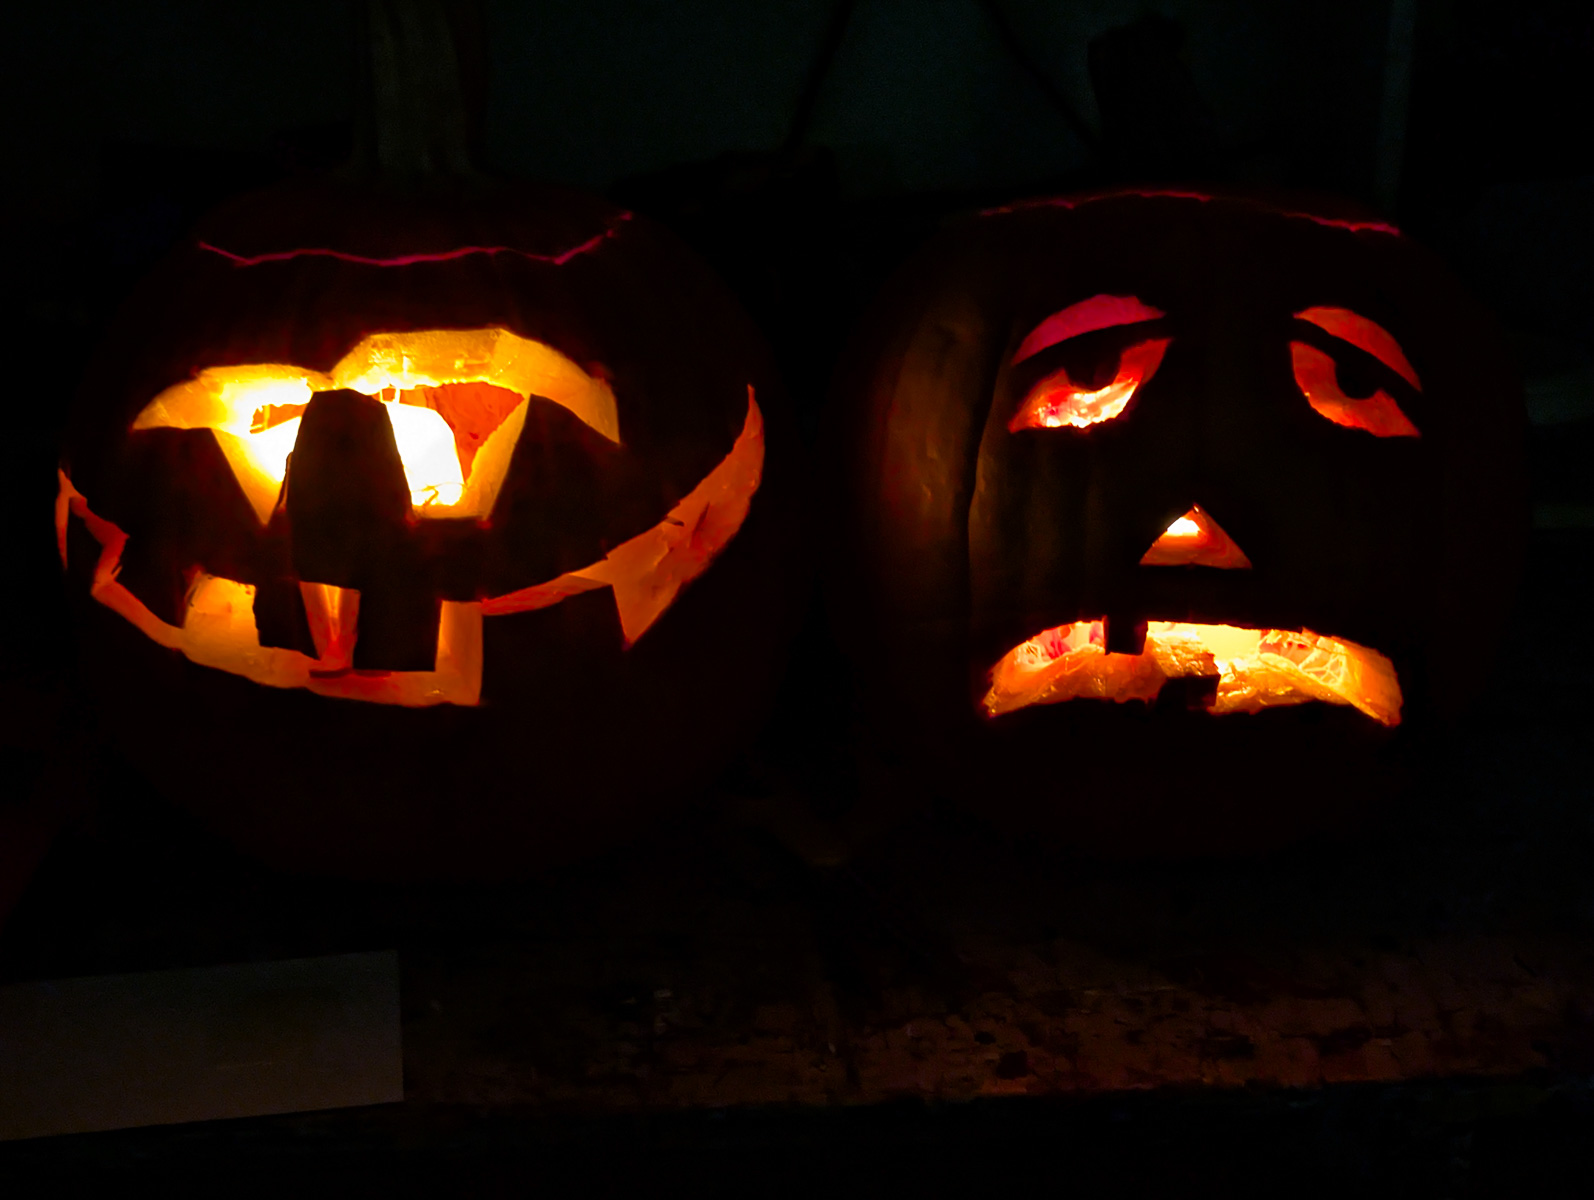
263. Halloween
Acrylic, 24″ x 20″ canvas. October, 2024
I started with random blobs from my palette. For a couple of months I thought this was a decent abstract painting, but then I wanted to paint some more, so I studied the blobs, looking for images, and I found a way to crop down a blob to get that big, crooked critter in the middle. I was working on my novel Sqinks, which features some bad aliens called Mu9ers. I turned the other blobs into shambling zombie-like figures like the one in the middle, ending up with a posse of invading Mu9ers. Rather than putting pupil-dots in the white eye-disks, I left them blank, so they’re like goggles. I used six different shades of orange and yellow for the background, creating a lively Hell-scape feel. Clearly this is a Halloween painting, but I hoped it would help me write another chapter about the Mu9ers in my novel.
- Writing works at many levels. Ping-pong of social network comments. Poems. Graffiti. Email messages. Stories and essays. Novels and tomes. Often, when writing, you don’t know exactly what you’ll say….at least not the details of it. You have a give and take with the text. Rereading it, correcting it, emending it.
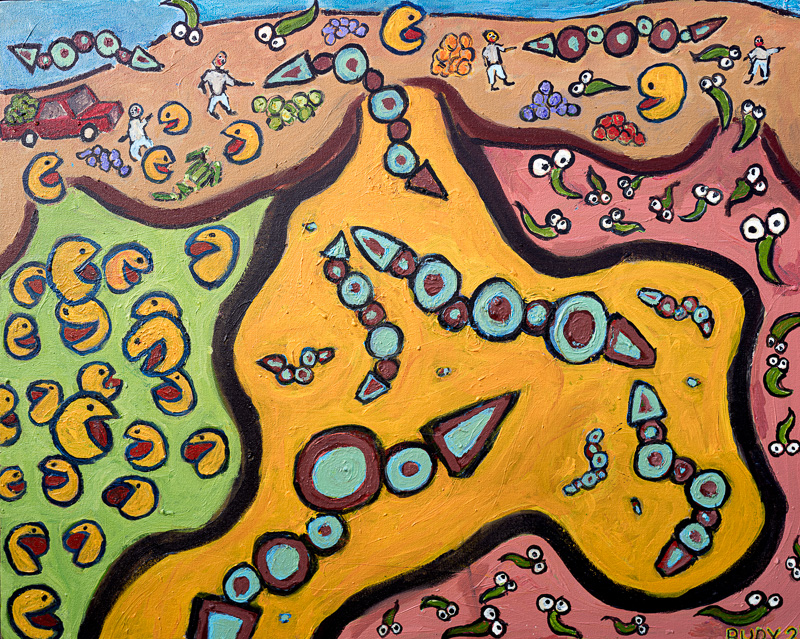
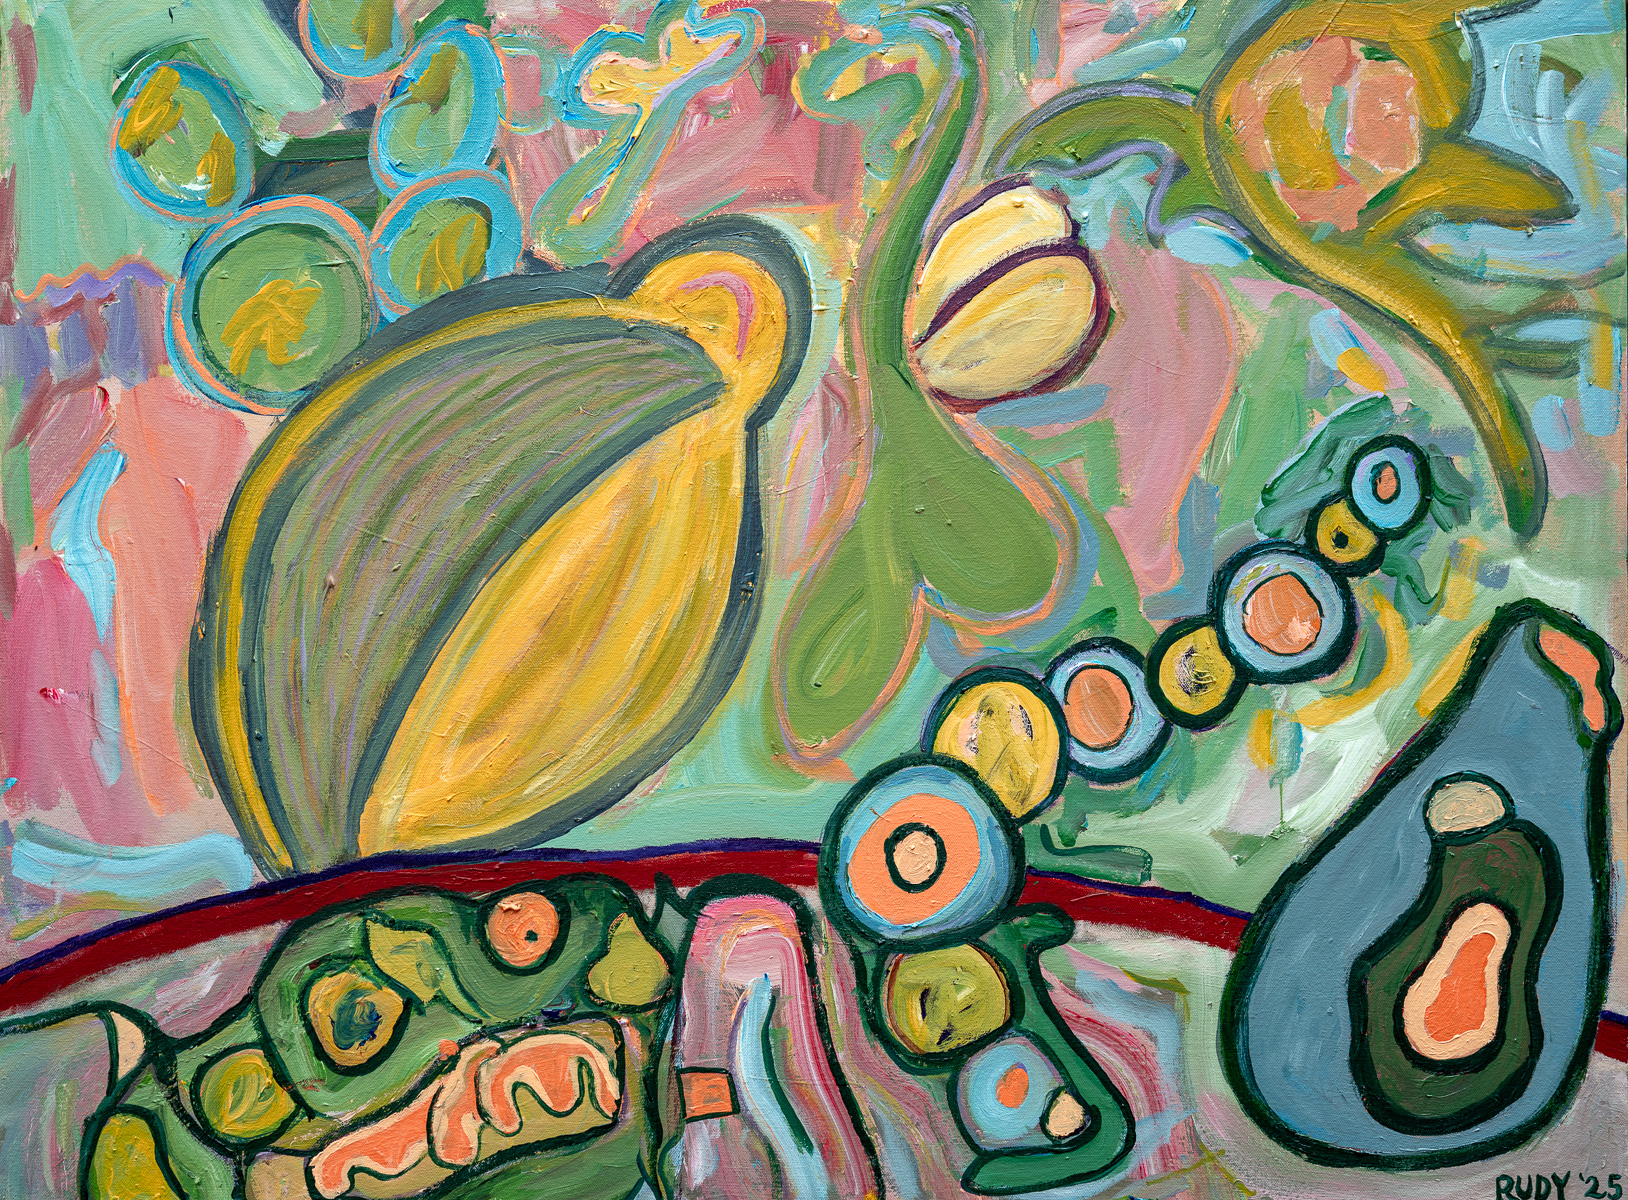
266. Farmers Market
Acrylic, 30″ x 24″ canvas. January, 2024
I kept thinking about some new aliens I was going to call sqinks. I formed the notion that the sqinks might be trading or shopping at a farmers market here. What would they want? Perhaps fresh fruit and vegetables, which are among the most unique treasures that a planet has to offer. To liven things up I added two more alien races that you might call happies and spikes. The aliens are emerging from an underground portal system, with volcano-like exits. I like the colors and the crowded feel of this one—perhaps a bit like a scene from my beloved Bruegel.
- <No more talk notes, but dig the pictures and the raps.>
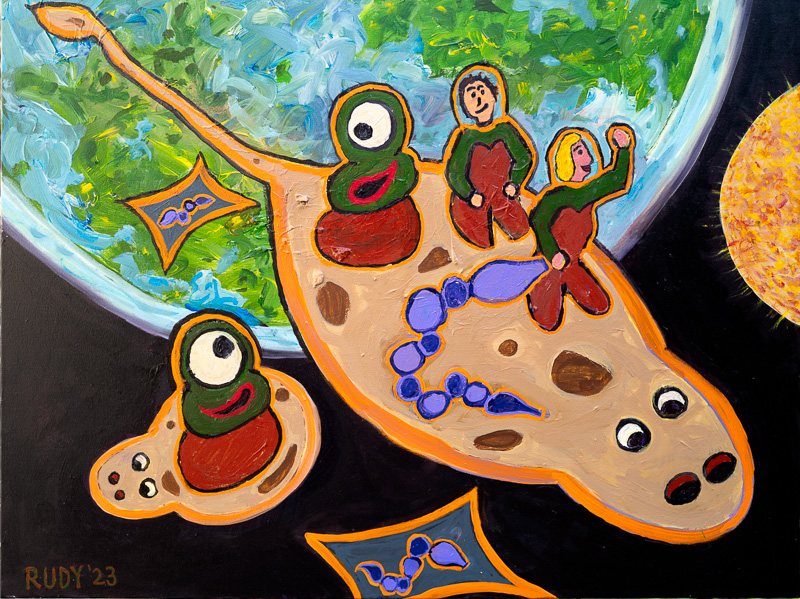
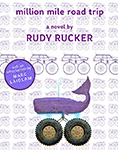
265. Riding the Flat Cows
Acrylic, 40″ x 30″ canvas. November, 2023
In 2013 I painted 160: Flat Cow, showing a squashed-flat flying cow that appears in my novel Million Mile Road Trip. The flat cows amuse me, so I painted a couple more of them here, adding a spacefarer couple and three odd critters (not our children). I call the purple ones “sqinks” because it’s a creepy word. And it’s always fun to have a planet in the background. I this image for my 2023 Christmas e-card. And what’s going on in this scene? Who knows. Oh, and I’m thinking those warped little rectangles are teleportation portals..
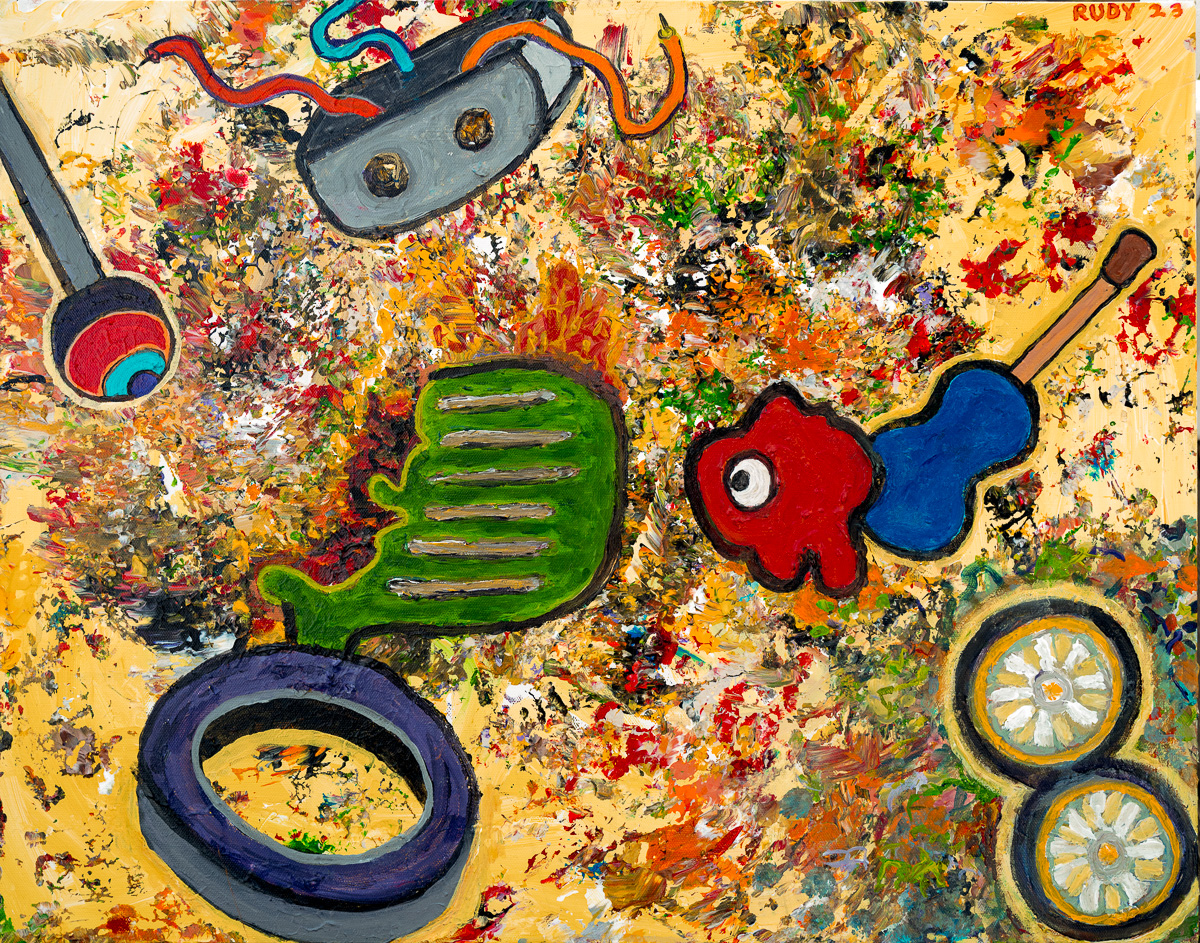
262. Dating
Acrylic, 30″ x 24″ canvas. October, 2023
This is what you might call a Rorschach painting. I use my old disposable paper palette like a stamp, putting patterns on the new canvas. And then I paint what I see. That green thing in the middle was the first to appear, and I thought of the grill of a particular kind of car, the 1956 Edsel. So the initial title for the painting was Wrecked Edsel. I added a tire, a gearshift knob, some kind of controller box, plus a couple of headlights which, in the end, look more like flowers. Plus a guitar—perhaps it was in the back And a Rudy-standard the blob with an eye. An alternate interpretation came to me: Online Dating. I had lost my wife, and I was trying, with little pleasure or success, to find a woman friend. And it occurred to me that my messy, disorganized image symbolized, in some way, dating. Note here that the candidates group into four pairs!
260. Cyberpunk Forever
Acrylic, 40″ x 30″ canvas. August, 2023
A painting like this is an exercise in balancing the forms, hues, sizes, and values of brightness. It took me a long time, with multiple revisions. I needed to stay continually open to revising major parts of it. By the end I was glad I was done, but it was worth it. I find the work pleasing to look at. A flag to celebrate my way of seeing things: Cyberpunk Forever.
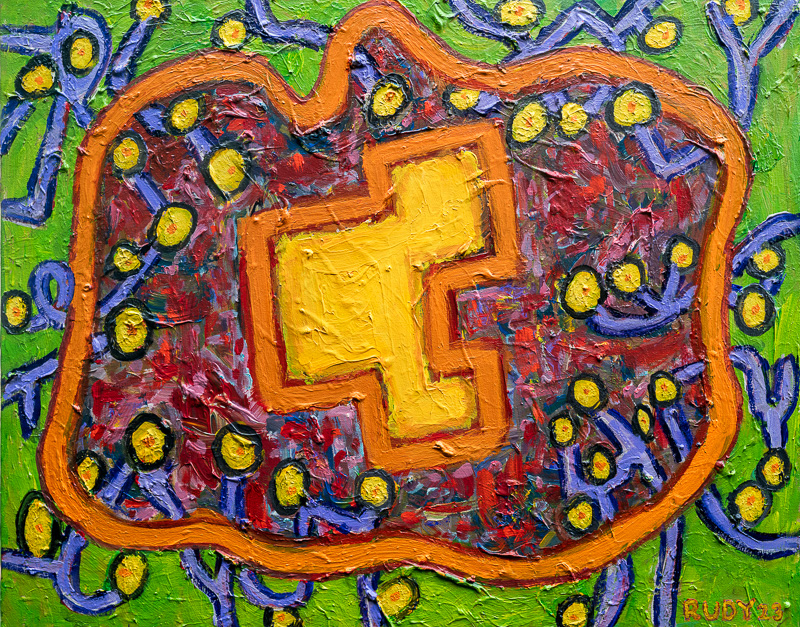
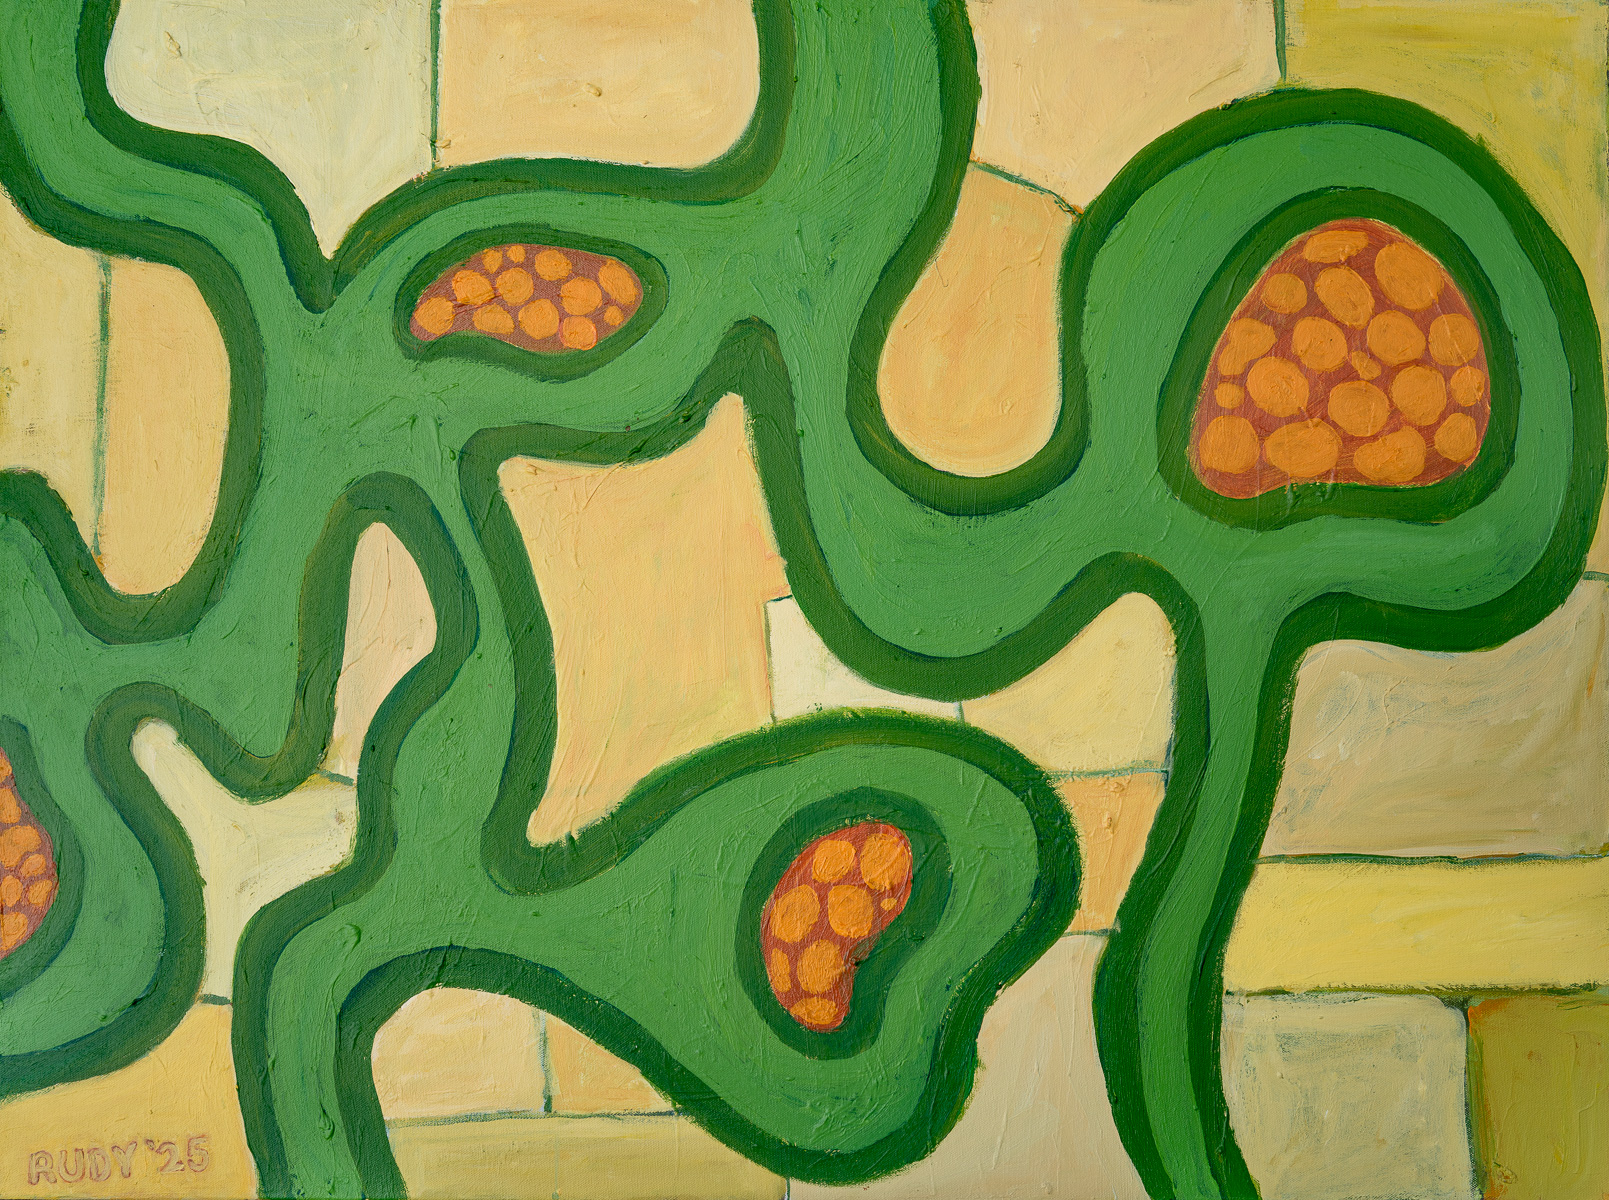
253. Neuron
Acrylic, 40″ x 30″ canvas. May, 2023
I started with the reddish blob in the center, and went on from there, first adding an orange edge, then putting green outside the edge, and then coming up with a network of yellow dots connected by purple tubes. I began thinking of this as an image of a neuron in your brain, with its connective synapses. And of course I was inspired by the then-current work on artificial neural networks as a path to AI. These networks have a flaw, in that no processing is taking place within the individual artificial neurons. So inspired by a paper by Stephen Wolfram, I went ahead and put a cellular-automaton-like pattern inside the neuron—so that it can “think” on its own. But mainly this painting is about richly interacting colors.
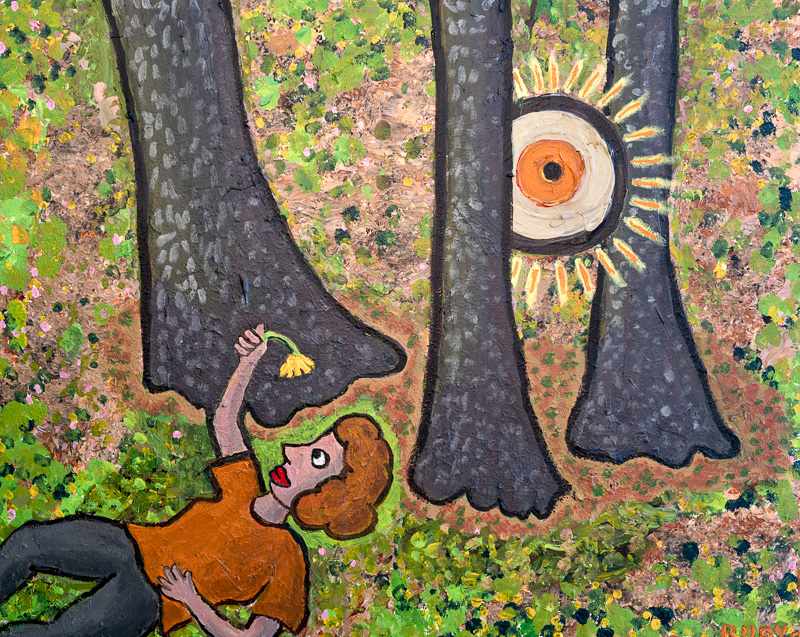
249. The One
Acrylic, 30″ x 24″. May, 2023
I was hiking with a friend, and we were talking about gnarl, and the nature of mind, and of higher consciousness. When we lay down on a rock to rest, I was thinking about the cosmic One being present in every part of nature. So this painting shows a person looking at a flower, with a divine eye nearby. Instead of having the person look like me, I had them be a woman. I was thinking of my recently lost wife. It seemed fitting to show her laid out with a flower, and with the divine One nearby. You might even call this a painting of heaven.
![]()
247. Empty Mind
Acrylic, 28″ x 22″. April, 2023
I did my reuse-the-paint-on-the-palette-from-the-previous-painting routine for the background. And I put lots of circles on top. I considered leaving the circles blank and empty, but it’s more fun to see a lot of eyes. I wasn’t thinking much of anything while I made Empty Mind, I was just painting, letting it come out. I enjoyed the process itself, as a way to get away from the raw and heavy grief I was experiencing. I thought of book called The Zen Doctrine of No-Mind, by D. T. Suzuki. I never read much of that book— it’s extremely technical and philosophical, almost like Hegel or Kant, but I was always amused by the title. The eyeballs are mirrors of the ongoing empty mind of the cosmos—quite unrelated to our individual fates. The world just going on.
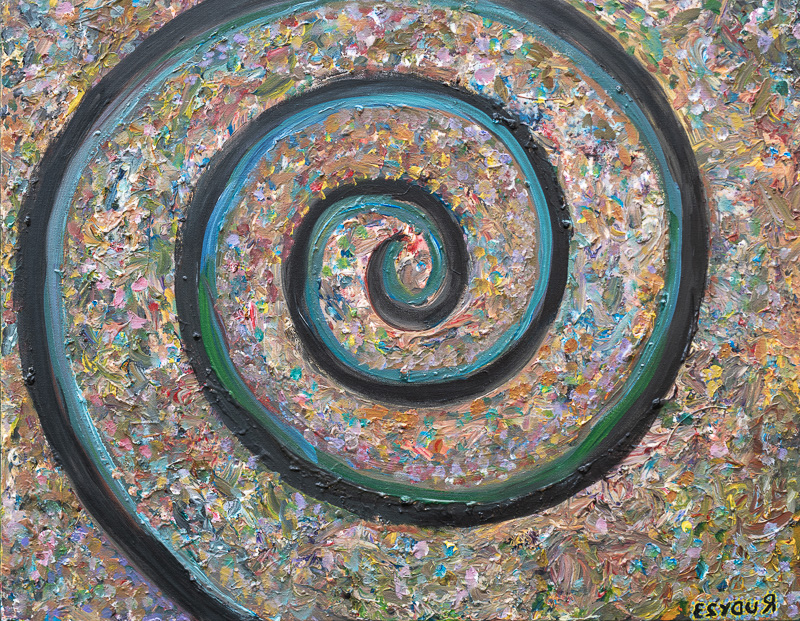
244. The Same Yet Changed I Rise Again
Acrylic, 28″ x 22″. Mar, 2023
I started with a background that I created by pressing my used-up paper palette against the canvas. When I do this, I don’t smear the palette around, I use it like a stamp, pressing it repeatedly. Then I touch up all the blank spots. And then I painted the simples possible thing I could think of. The so-called logarithmic spiral or growth spiral, similar to the one seen in nautilus shells. It was extensively investigated in the 17th Century by the Swiss mathematician Jacob Bernoulli who wanted it inscribed on his tombstone with the Latin phrase “Eadem mutata resurgo,” which means “The same yet changed, I rise again.” This phrase is a personal touchstone of mine, and I always invoke it when stating a new project, or a new phase of my life.
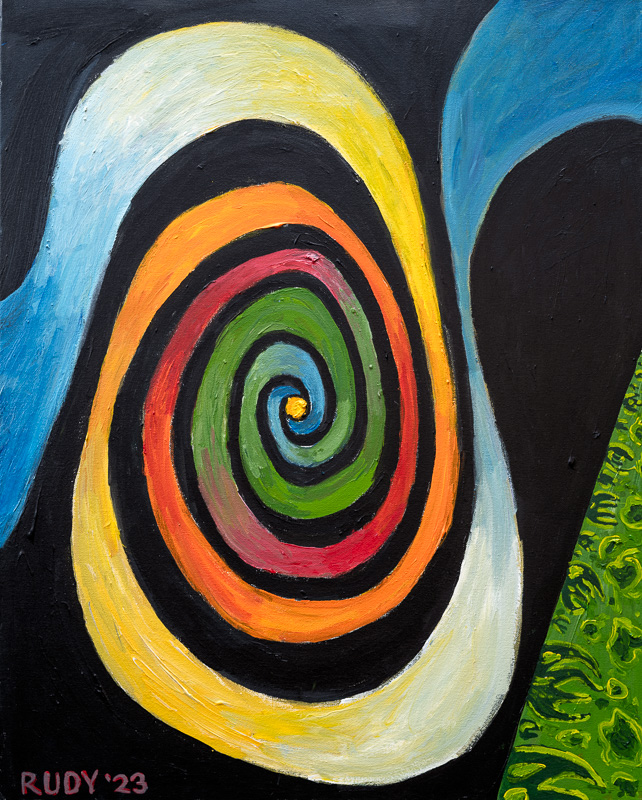
242. Whoop-Di-Doo
Acrylic, 24″ x 30″. Jan, 2023
I wanted to get away from narration. My wife was in her last weeks, dying on a hospital bed in our living room, and we knew what was coming, even though at some level we didn’t know. Couldn’t visualize it. Taking solace in math, I decided to paint an intricate image that I found with a cubic Mandelbrot set algorithm that I unearthed some years ago. The interesting thing here is that there are two nested spirals. One goes in from the left, the other goes out the right. They meet at that yellow dot in the center. Like death and rebirth. And that lively green triangle at the lower right? That’s paradise, the garden of Eden. The term whoop-di-doo is used by skaters, snowboarders, and bicyclists to describe a funky twirl.
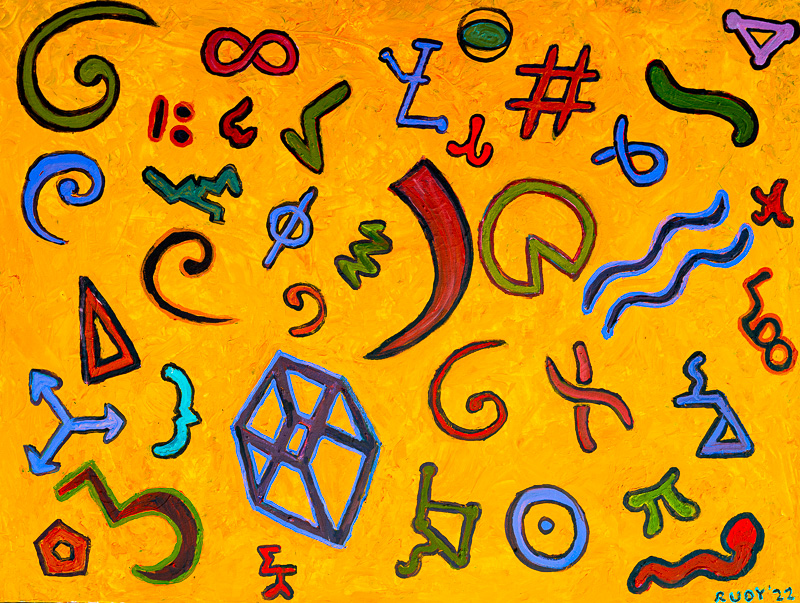
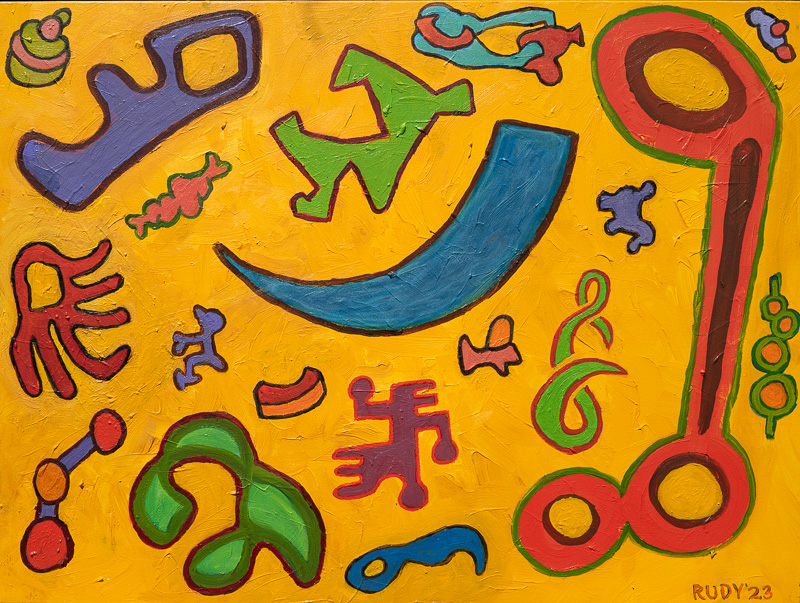
241. Math
Acrylic, 40″ x 30″. Dec, 2022.
Sometimes I just paint a nice background and scatter things across it. Here I used about four different shades of yellow. I laid the canvas on the ground and squirted on yellow blobs from above, along with globs of buff white along with impasto medium. I smeared it around, being careful not to overdo the smearing. I didn’t want to homogenize it; I wanted the seething push-pull of the varying shades. That swoop in the middle is a shape from Wassily Kandinsky. And I added various shapes that are (or might be) from mathematics. Balancing the colors and inventing fake symbols was a big part of this.
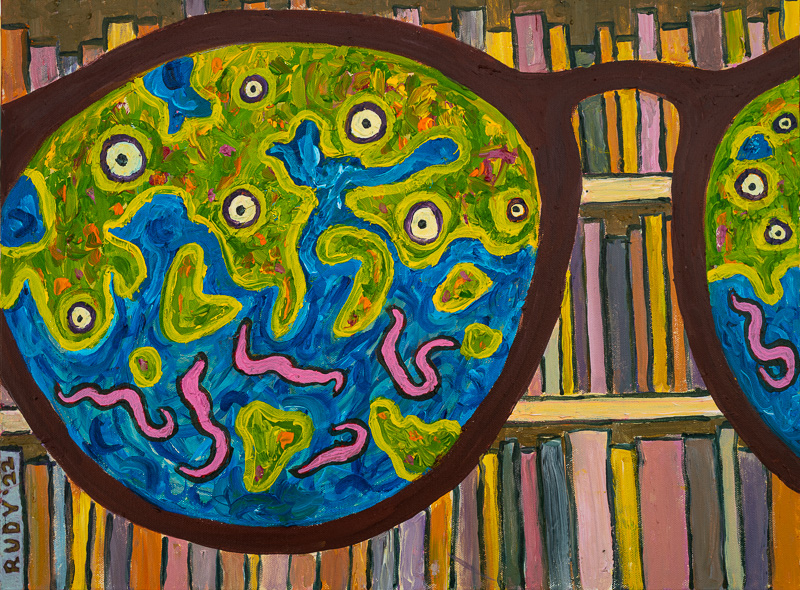
237. New Glasses
Acrylic, 24″ x 18″. November 2022
I was in the process of buying new lenses for two pairs of glasses, and the lenses were unbelievably expensive, and then I had to get them redone. When things bug me, I try to make art from experience. So…what if my so-called glasses were some kind of teep aid, or empathy receiver, or pheromone sniffer, or vibe feeler. Suppose that, wearing them, I sense something unusual. Ghosts, aliens, creatures from the subdimensions. The experience ruins me, and I end up like those unfortunates I saw writhing in the alley behind the optician, the degens known as snorkers. Idea for a story? But too much trouble to write it. So I painted the view through the…new glasses. With the glasses in front of the bookcase in my office. My nephew bought the painting almost right away. He said I should do a second painting, in which you see the books through the lenses, and you see those fractal land-and-water patterns outside the lenses. It would be a whole different scenario, with the glasses an island of sanity, as opposed to a door into madness. But, yeah, in the story the guy could flip from one to the other. Hmm. Maybe someday.
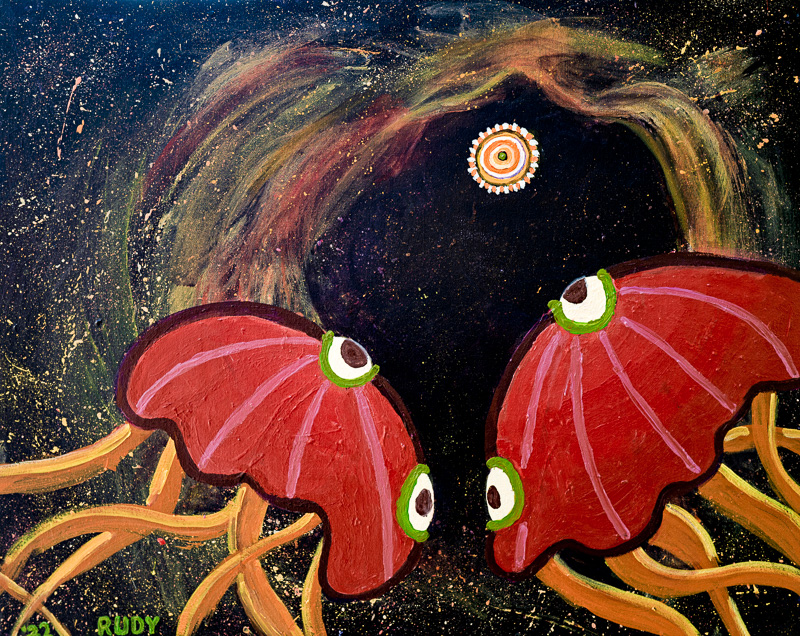
236. Going to Heaven
Acrylic, 30″ x 24″, October, 2022
The two space jellies are poised at start of a great adventure. I think of them as a couple, about to die one by one, and eventually going to heaven. The hazy shape around the star was inspired by a photo of the Tarantula Nebula. I gave each of the jellies two eyes, so they can be looking at two different things: here it’s each other and their goal. I put a green border around the jellyfish eyes. And the target star has a dot of green at its center. And my signature is green as well.
Images are Copyright (C) Rudy Rucker, 2026. For more info on Rudy’s art, go to his Paintings Page.
Note that I have a new edition of my art-book / catalog in print: Better W0rlds.